Using Plasmic through Chrome DevTools MCP
- Authors
- Link
- Alex Noel

- Last updated
What if you could ask your AI agent to open a Plasmic project, inspect what is already there, and then build or edit the design for you?
That is now possible through Chrome DevTools MCP and Plasmic’s browser-side API layer!
This is currently a technical workflow for people already comfortable configuring MCP tools and driving a browser through an AI coding agent. We are still working on a first-party Plasmic AI experience; this gives technical users an early, scriptable way to experiment with AI-driven Studio edits today.
Instead of generating one-off React spaghetti that quickly drifts from the rest of your project, the agent can create reusable components and pages inside Plasmic itself, which you can keep editing either through prompts or visually on the canvas.
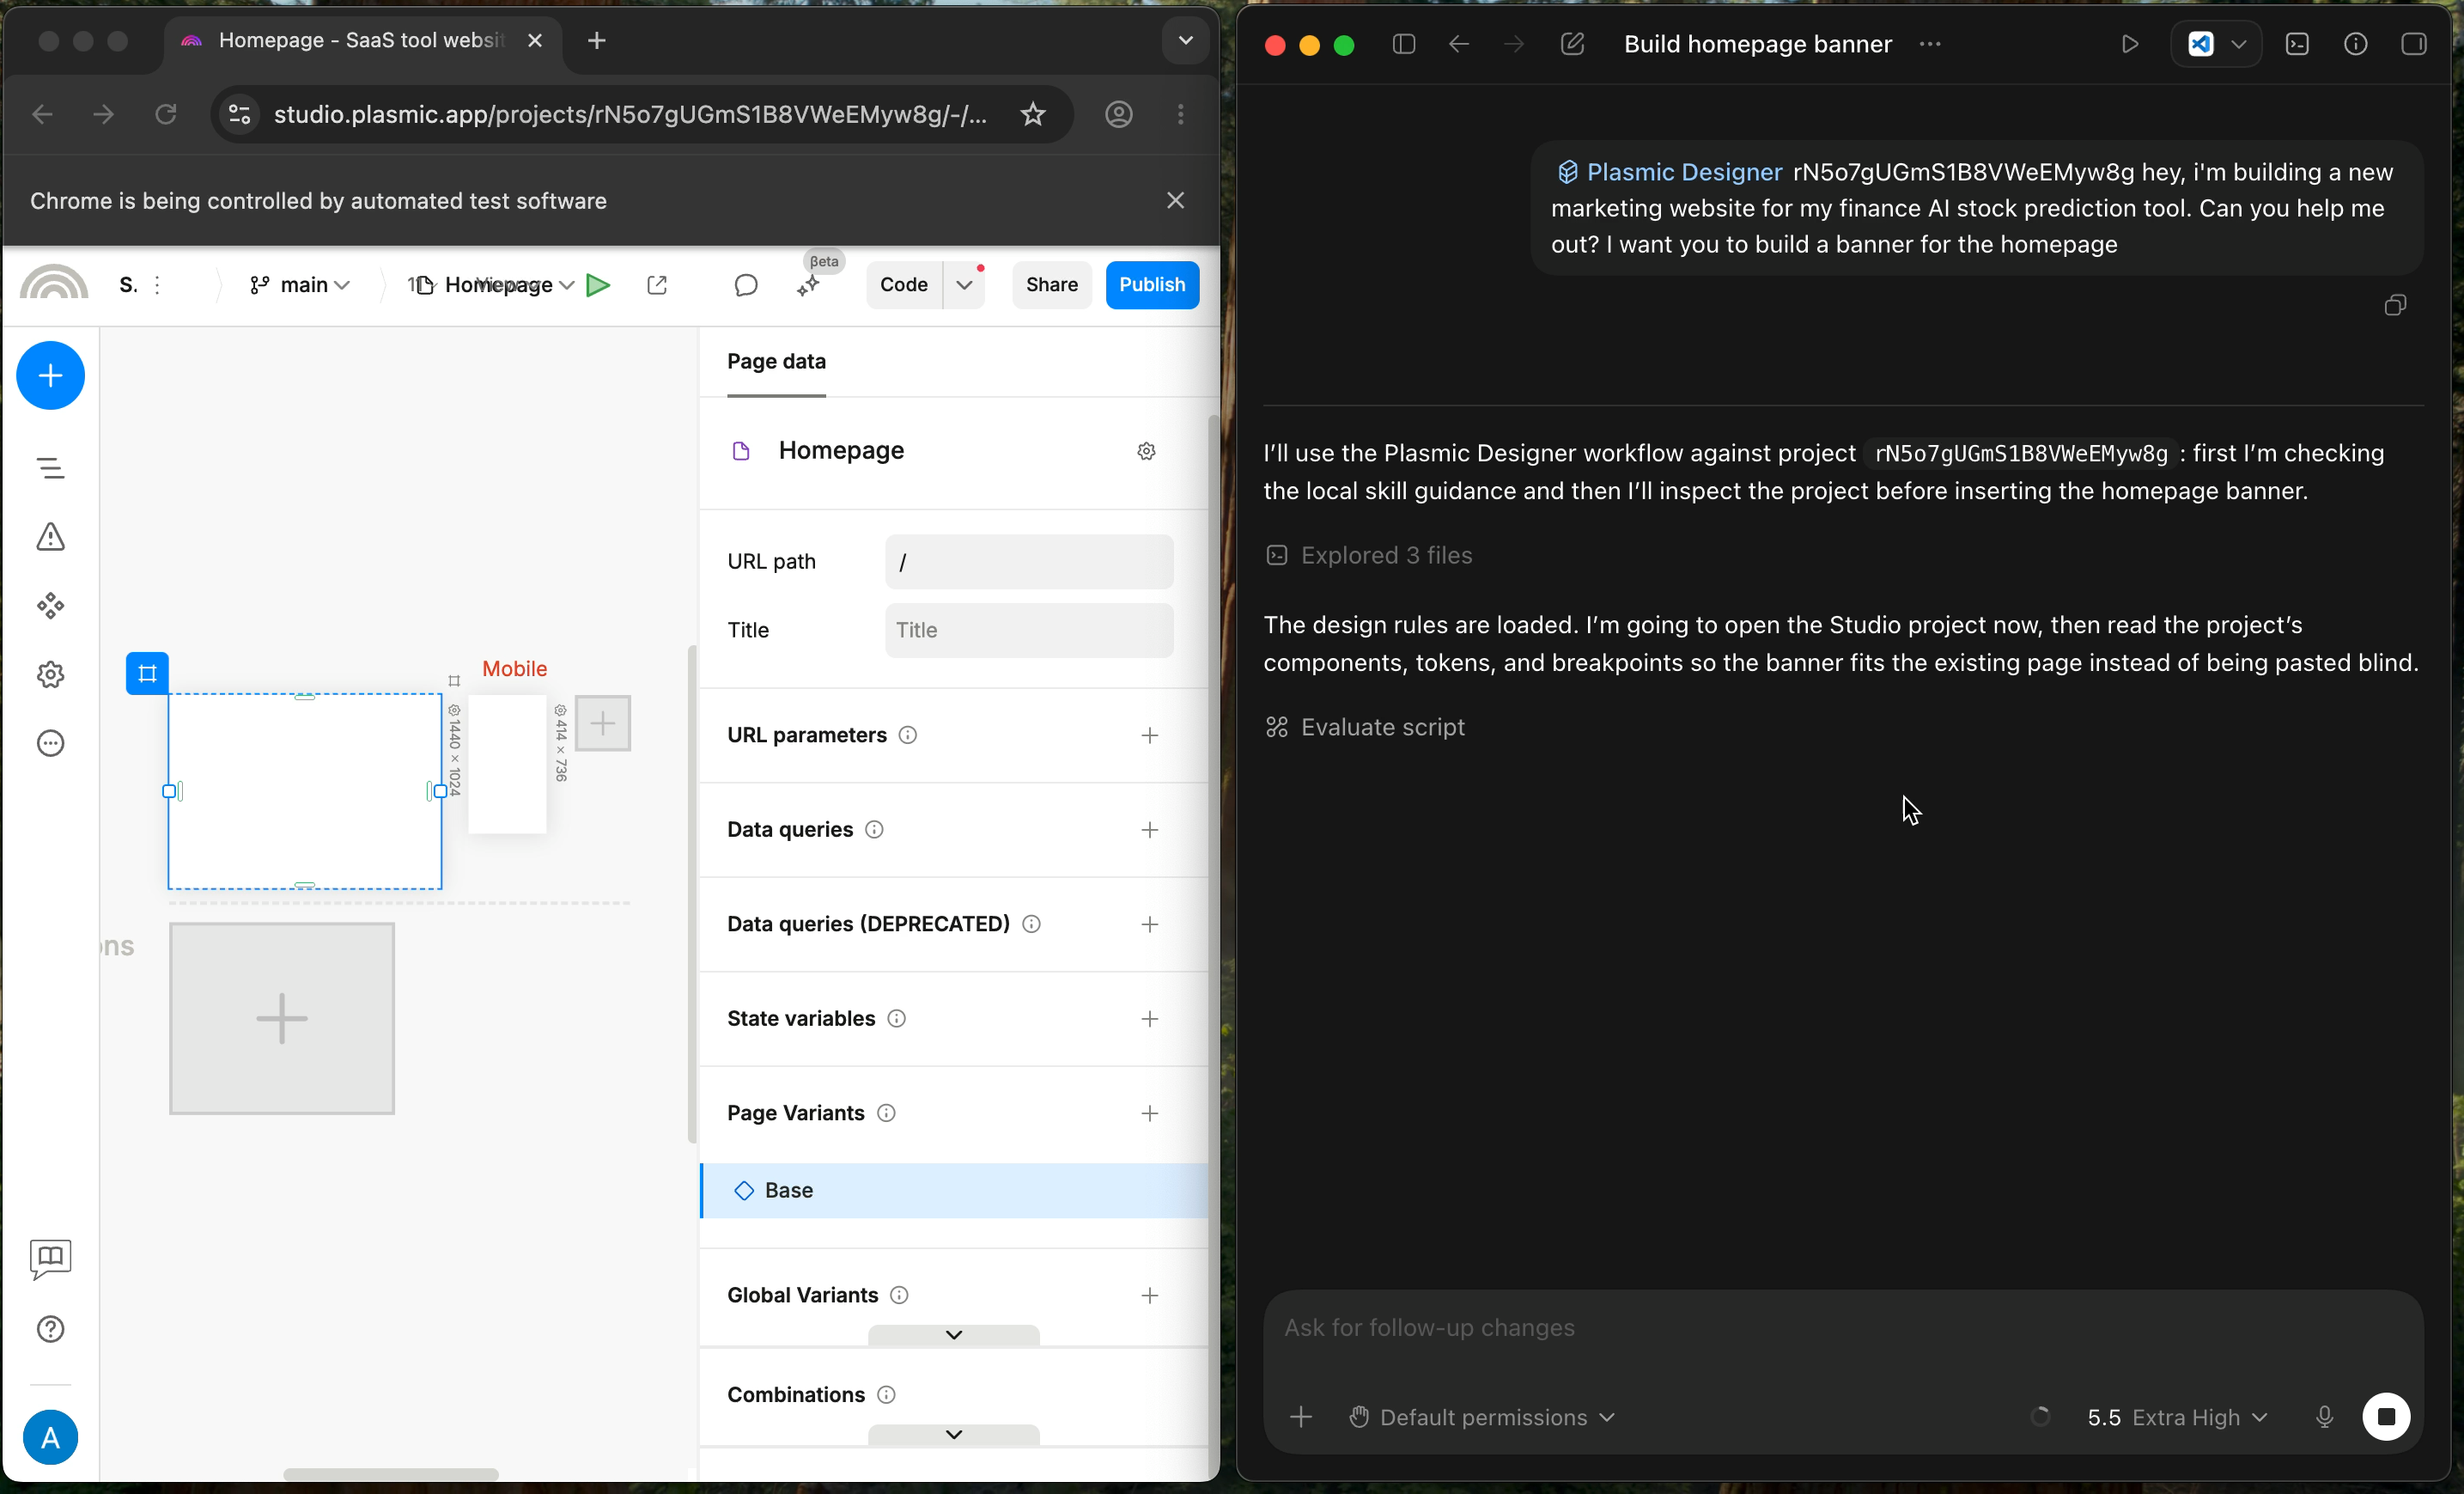
Just imagine the possibilities:
- “Hey Claude, add a hero section to the homepage and make it feel more modern”
- “Copilot, can you read the existing components and create a new pricing page that reuses the current button and card styles?”
- “Cursor, open the About page and improve the spacing and typography for better readability on mobile”
- “Antigravity, find the testimonial card component and make it cleaner and more consistent with the rest of the design system”
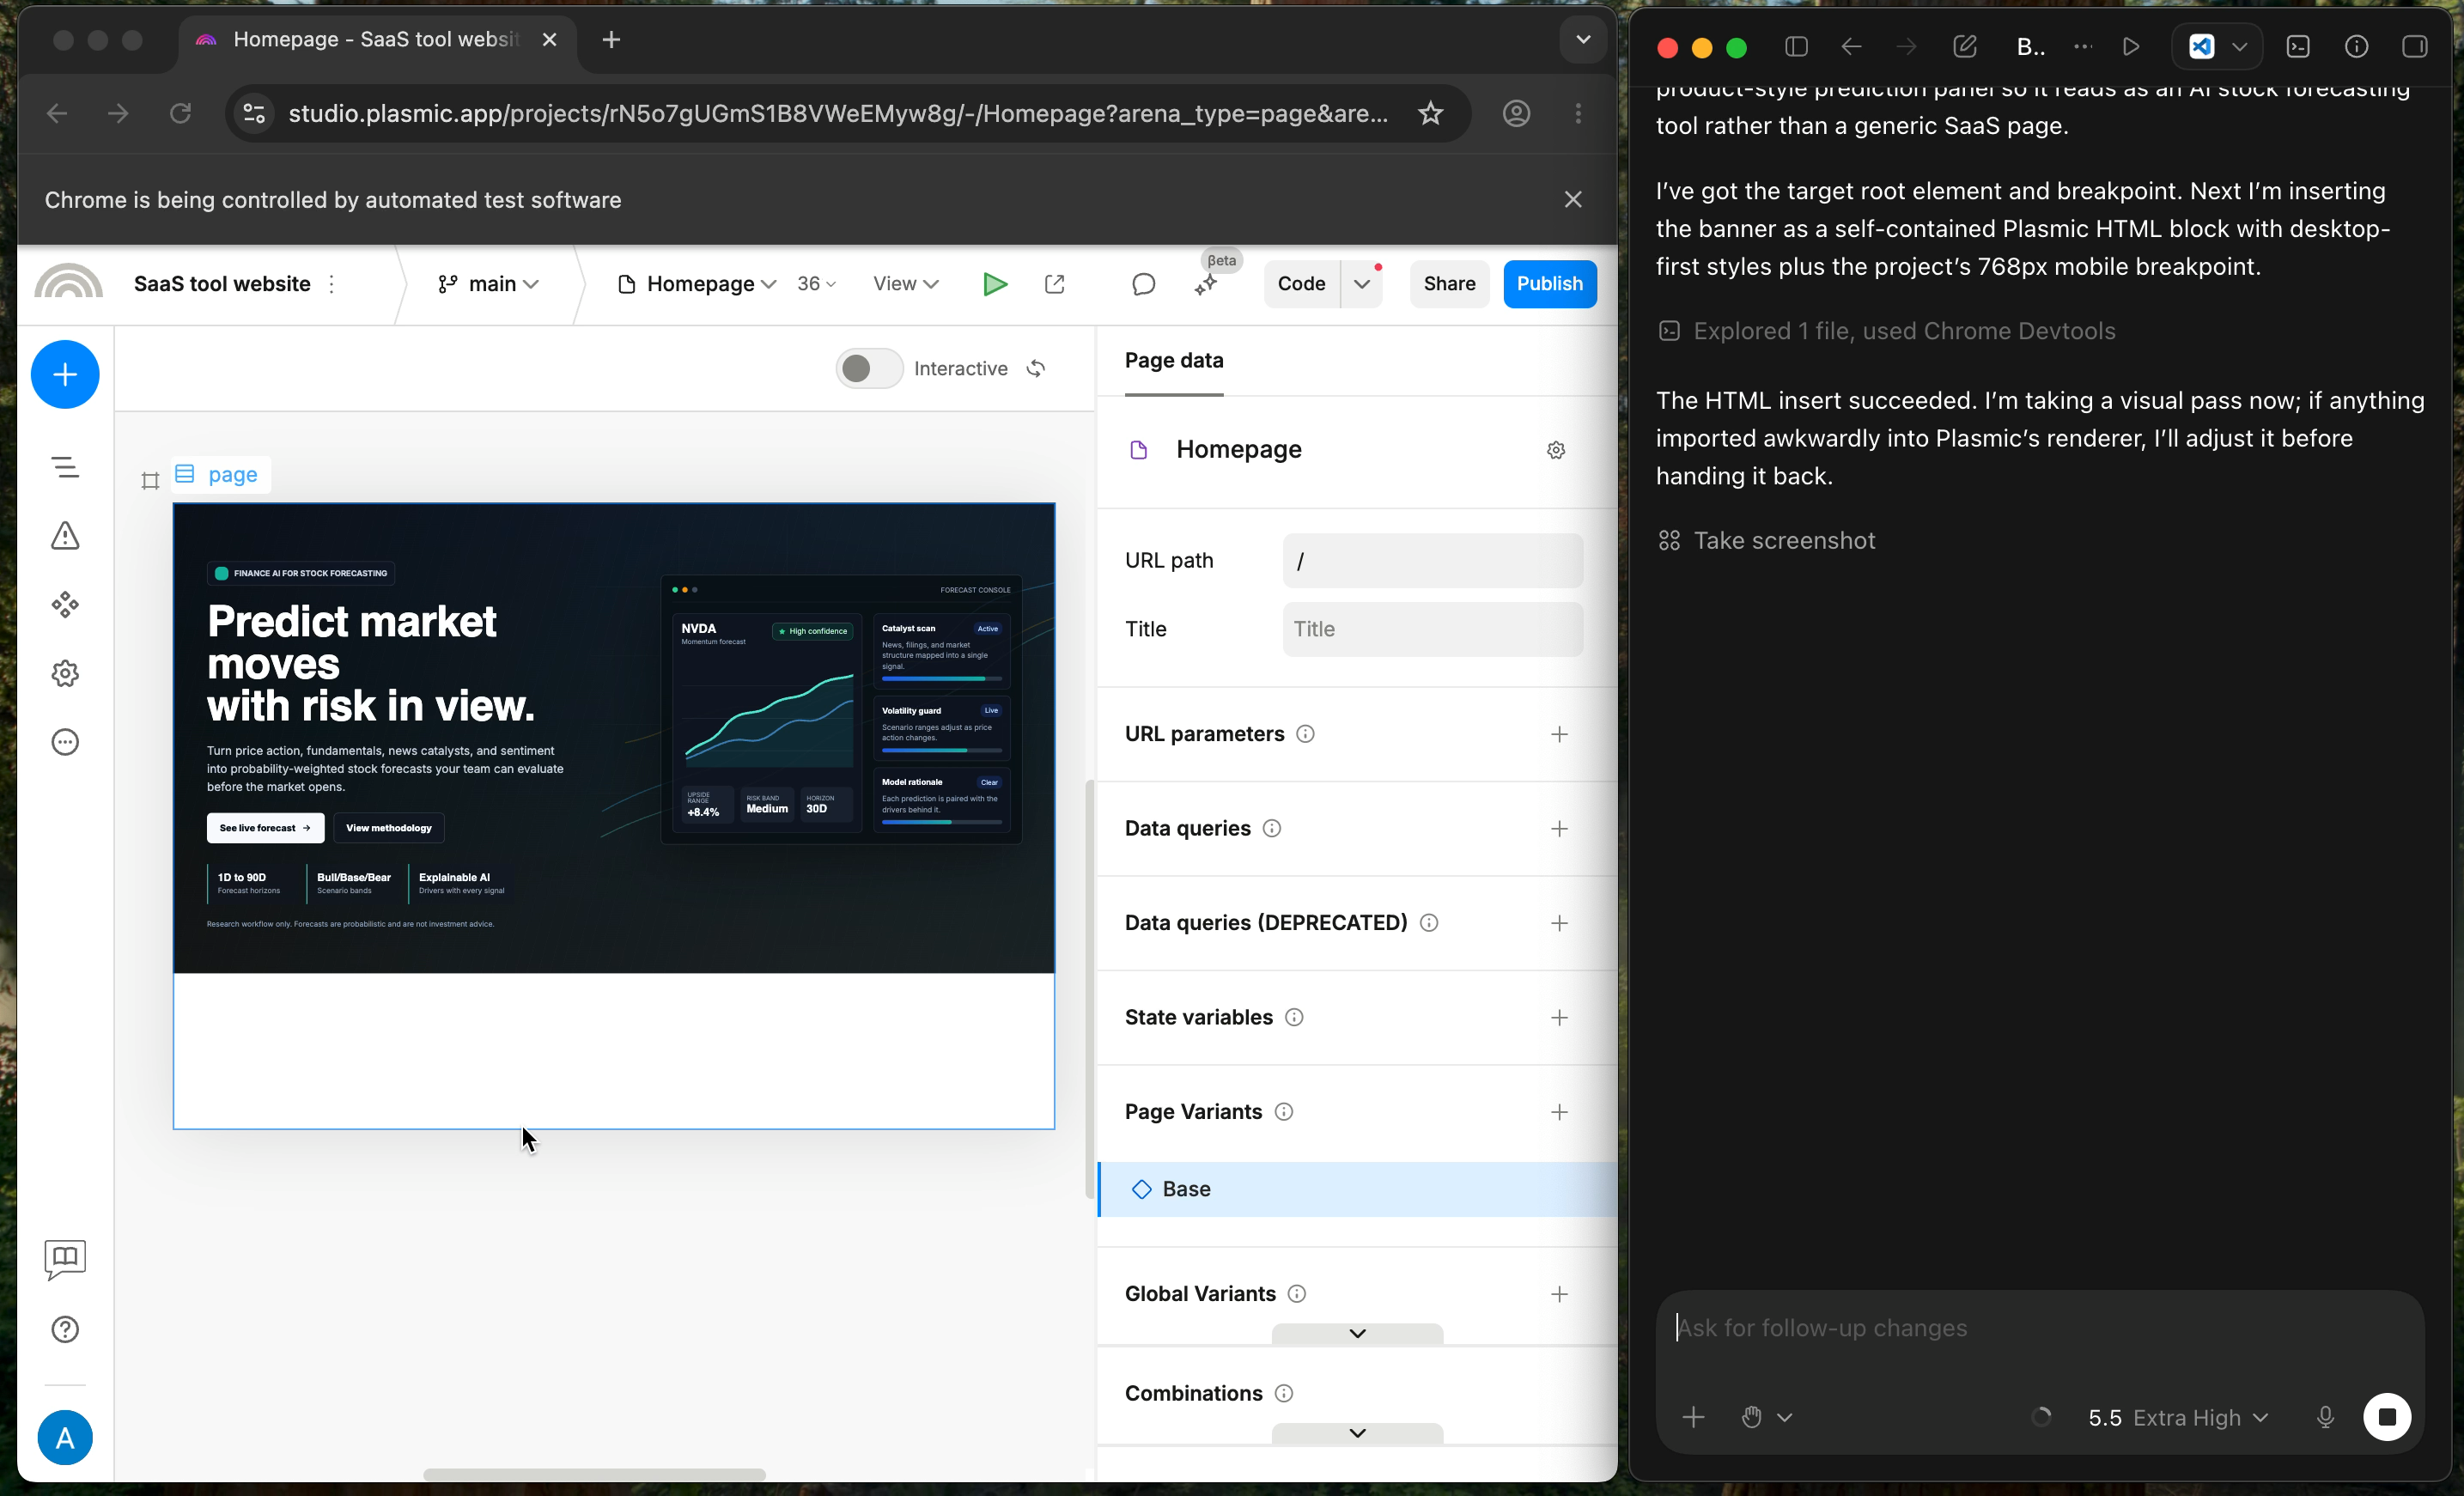
Here’s how the response looks in the canvas:
What I can do with it?
The workflow that we are about to explore might feel somewhat similar to recently launched Claude Design in terms of what it does, but it is actually quite different. Hold your seats…
- Your AI agent connects to Chrome through the Chrome DevTools MCP server.
- It opens your Plasmic project in the browser.
- It waits for Plasmic Studio to load.
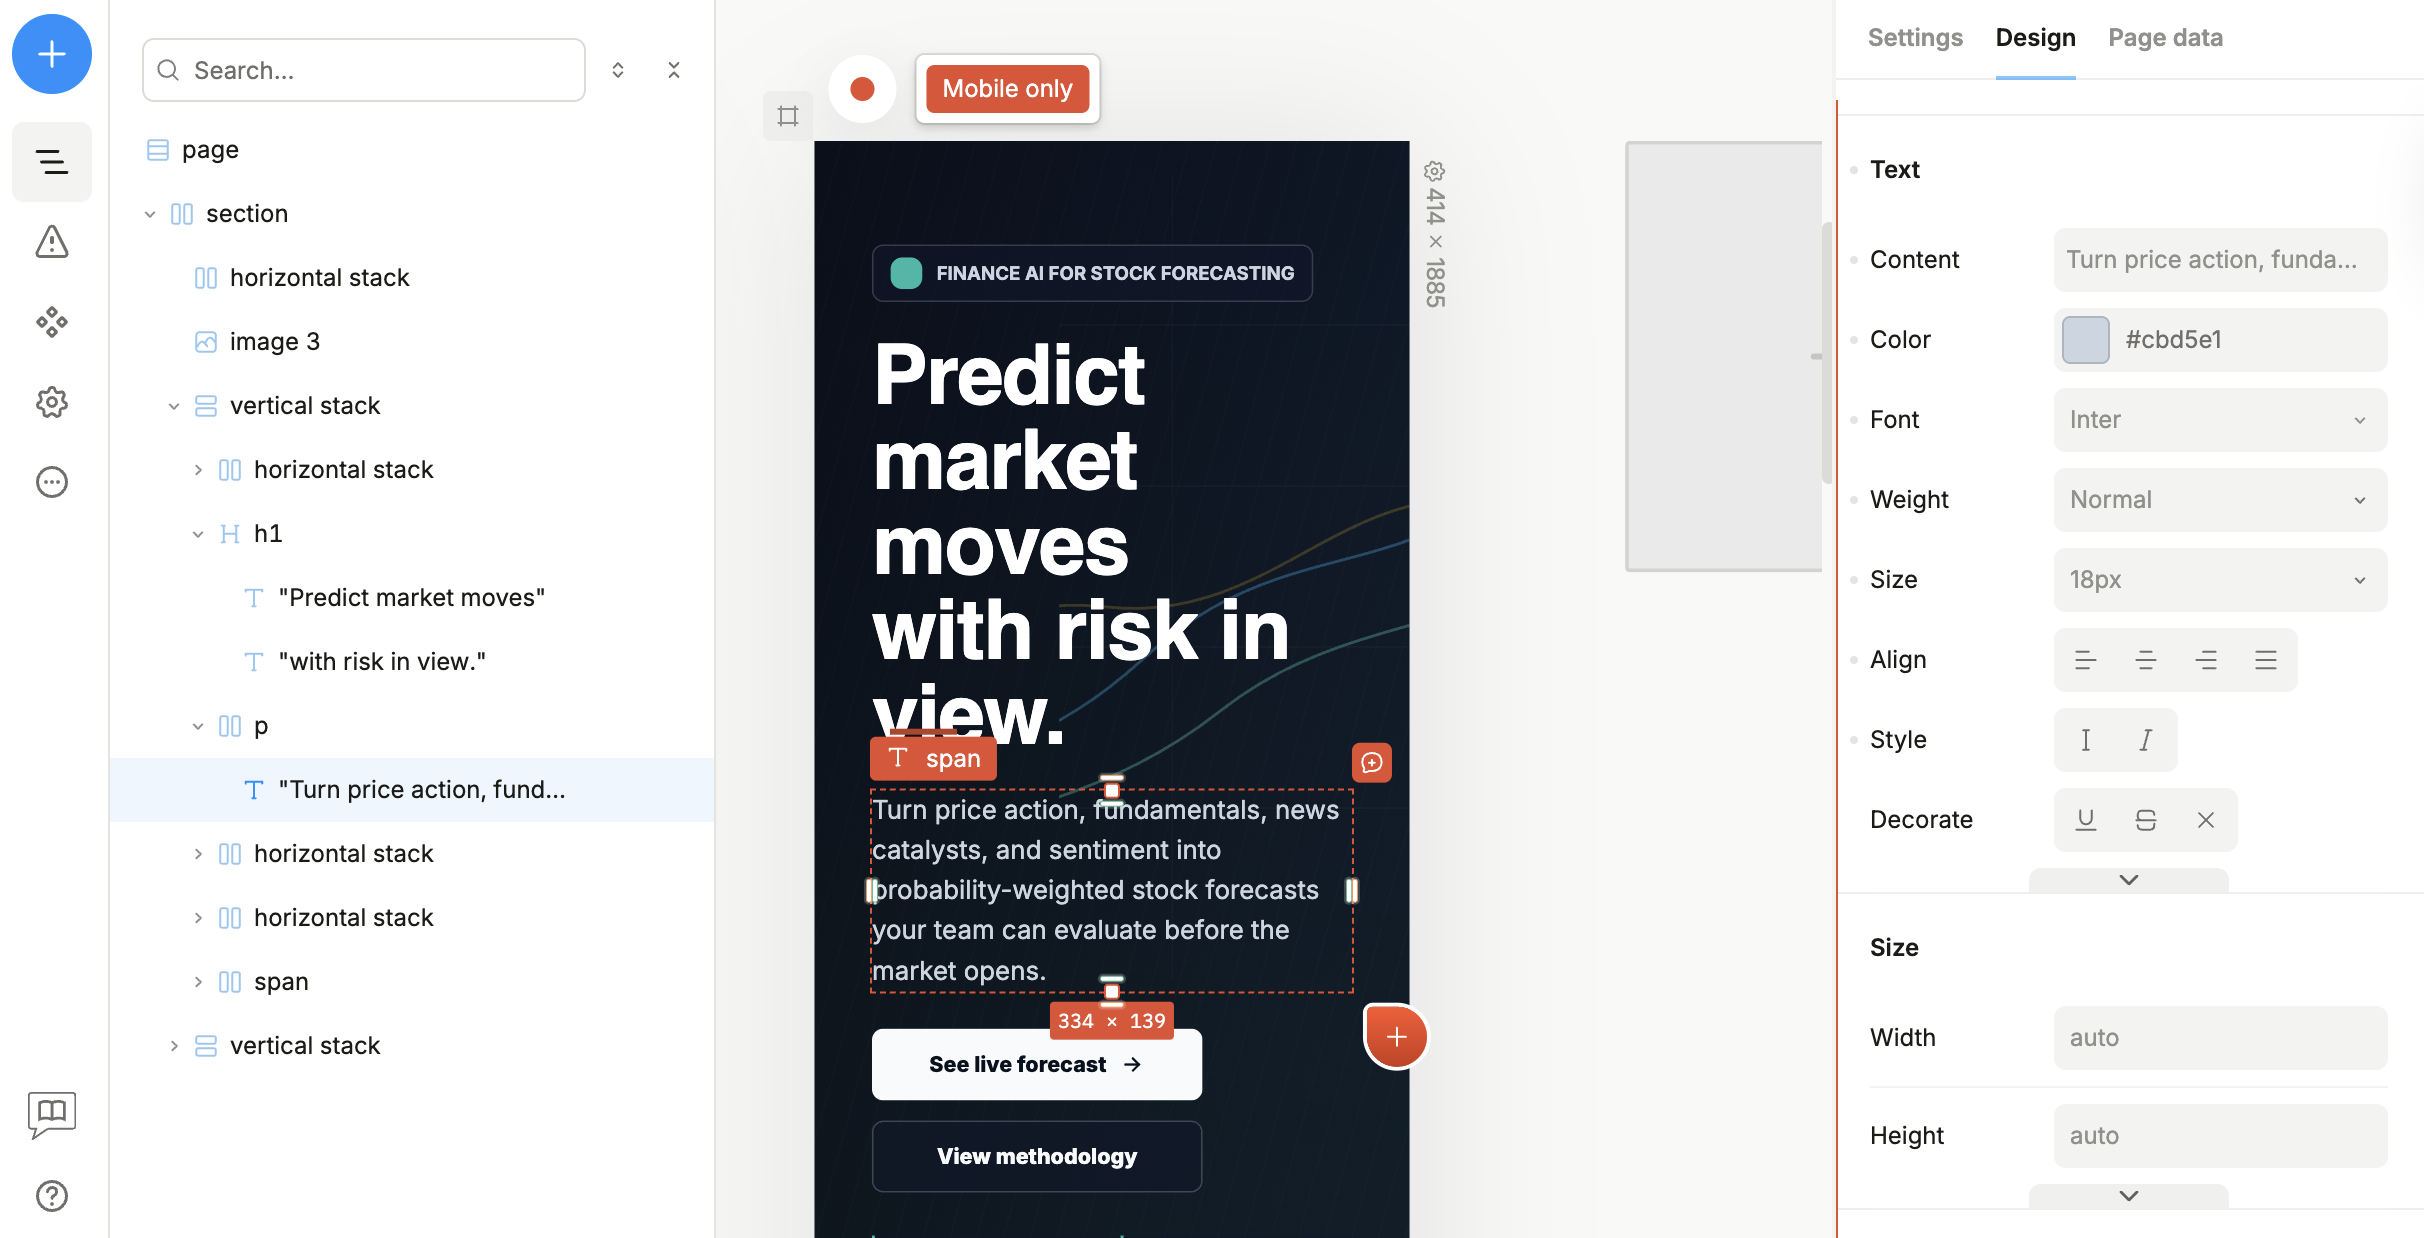
- It uses Plasmic’s API layer to read the project bundle: components, tokens, animations, breakpoints, variants, and elements.
- It inserts new elements, creates pages and components, changes styles, or removes elements.
- You review the result in the canvas, save a published version if you like the direction, and keep going.
That is the important difference from Claude Design: the output remains a fully owned Plasmic project. You can keep editing it visually, publish versions, and, when your workflow uses generated code, sync those components and pages back into your codebase with Plasmic codegen.
Use cases
You might find it helpful if you fall into one of a few different groups:
- Designers who want to move faster without writing every section by hand
- Developers who want to make large visual changes without clicking through every panel
- Marketers who need quick landing page experiments
- Agencies that need to ship many page variants fast
- Content teams that want to update layouts without starting from scratch
- Product teams that would rather work in the visual builder than maintain large amounts of UI code by hand
The main win is that the agent can work with what you already built and extend it instead of starting from zero each time.
That matters because most real projects are not blank canvases. You already have buttons, cards, navbars, tokens, and section patterns. A capable agent can read those first and reuse them instead of rebuilding everything from scratch.
Prerequisites
Before you try this workflow, make sure you have:
- Node.js 20.19 or newer
- Google Chrome
- A Plasmic account
- A Plasmic project
- An AI assistant that supports MCP
You will also need your Plasmic project ID.
You can find it in the project URL:
https://studio.plasmic.app/projects/j2Bm3mrbGNKsXVW3Wf5KpP
In that example, the project ID is j2Bm3mrbGNKsXVW3Wf5KpP.
Getting started
For tool-specific setup details, see the plasmic-designer setup README. In general, regardless of the tool you use, you need to configure two pieces:
Step 1. Install Chrome DevTools MCP
This gives your AI agent a way to control a Chrome session.
For example, in Claude Code, the setup can be as short as:
claude mcp add chrome-devtools -- npx chrome-devtools-mcp@latest --no-usage-statistics
Other agents use their own MCP config format, but the idea is the same: add chrome-devtools-mcp as an MCP server.
Step 2. The plasmic-designer skill
This is the skill that tells the agent how to work inside Plasmic Studio.
It tells the agent to:
- open the project
- wait for Studio to load
- inspect existing components before editing
- use the right API calls
- verify results after changes
You can copy it from the Plasmic GitHub repo and add it to your agent’s skill set.
Your first prompt
Once Chrome DevTools MCP and the plasmic-designer skill are installed, your first request can be very simple:
/plasmic-designer j2Bm3mrbGNKsXVW3Wf5KpP Add a hero section to the Homepage page
The first word after the skill name is the project ID. The rest is your request.
If your agent does not use slash-style skills, just give it the same information in plain language:
Use the plasmic-designer skill.
Project ID: j2Bm3mrbGNKsXVW3Wf5KpP
Task: Add a hero section to the Homepage page.
Under the hood
Plasmic Studio exposes a browser-side API called PLASMIC_AI_TOOLS.
That API gives the agent access to a set of actions, for example:
read()to inspect project datainsertHtml()to add new markup into a component or pagechangeElement()to update styles on existing elementsdeleteElement()to remove elements
So instead of clicking around in Chrome, the agent can efficiently manipulate the project like this:
- Call
read()to get the list of existing components and tokens. - Find a button component and a card component that it can reuse.
- Call
insertHtml()to add a new hero section that uses those components. - Call
changeElement()to adjust the spacing and typography on the new section. - Call
read()again to verify the new section is in place and looks correct.
Example: Create a new page
To create a new page, the agent might do something like this:
/plasmic designer j2Bm3mrbGNKsXVW3Wf5KpP Create a new page called Features.
Use a modern SaaS layout with a hero, a three-column feature grid, a testimonial row, and a final CTA.
Tips and tricks
Once the basic setup works, the quality of the result mostly depends on how clearly you describe the kind of Plasmic change you want.
There are multiple ways to achieve a goal
For example, suppose you ask the agent to “make this button more prominent.” That could mean several different things:
- Add more spacing around one Button instance.
- Switch that instance to an existing Button variant.
- Create a new Button variant and apply it only in this section.
- Change the Button component itself, which affects every page that uses it.
Those are all plausible interpretations, but they have very different blast radii. A stronger prompt tells the agent how you want the goal achieved:
On the Pricing page, make the primary CTA more prominent.
Prefer an existing Button variant if one fits.
If no variant fits, create a new variant instead of changing the base Button.
Do not modify Navbar, Footer, or site-wide color tokens.
This keeps a page-specific experiment from turning into an accidental design-system change.
Let the agent analyze your project
Agents are good at inspecting structure before and after a change. For larger edits, ask the agent to first identify the relevant pages, shared components, variants, tokens, and breakpoints. After the edit, ask it to verify what changed in both the project data and the visible canvas.
Inspect the existing homepage, shared layout components, tokens, and breakpoints.
Summarize the reusable pieces that fit this task.
Then add a new enterprise CTA section that reuses existing components where possible.
Afterward, report which pages and components changed, whether any shared component was modified, and what you checked at desktop and mobile breakpoints.
This is especially useful when the project already has a design system. You want the agent to treat Plasmic as a structured project, not a blank DOM tree.
Scope shared component edits carefully
When a task touches something reused, ask the agent to inspect that component’s variants, slots, and usages before changing it. For components like Navbar, Footer, Button, Card, and pricing tables, a small edit can affect many pages.
Before editing the Card component, inspect its variants and find all pages that use it.
If the change would affect unrelated pages, create a more specific variant instead.
This pattern tends to produce better Plasmic projects than detached markup, because the output remains editable and reusable after the agent is done.
Save project-specific rules
If your AI tool supports persistent instructions or memory, save the rules that matter for your project there. In Claude Code, for example, you can use CLAUDE.md files or auto memory for conventions the agent should remember across sessions.
For this project, always reuse the MarketingButton component for landing-page CTAs.
Use the spacing tokens instead of fixed pixel values.
Do not edit Navbar or Footer unless the task explicitly asks for it.
Rules like these compound over time and make future edits feel much less random.
Next steps
If you already use Plasmic, this is one of the most practical ways to bring AI into your workflow.
Try starting with a small, simple task like:
- make a new section
- clean up one component
- create a new page
- test one alternate hero
Once that feels reliable, you can move on to bigger jobs like building a new landing page, creating campaign variants, or cleaning up shared sections across multiple pages.
Try extending the plasmic-designer skill with your own project rules, helper prompts, or verification checks!
If you come up with something useful, or build a nice website or component that might benefit the community, share it in the Plasmic forum or Plasmic community Slack. We are excited to see how people use this new capability and would love to feature cool examples in our community channels.
Available in Plasmic, now. Happy designing!
Follow @plasmicapp on Twitter for the latest updates.