Using AI with no-code tools
- Authors
- Link
- Alex Noel

- Last updated
Overview
In this comprehensive guide, we’ll briefly explore the intersection of AI and no-code development, showcasing how these powerful tools complement each other allowing you to build your own unique web development workflow.
Next we’ll compare the most popular AI coding assistants—-Windsurf, v0, Cursor, and ChatGPT—-breaking down their unique strengths, limitations, and ideal use cases. You’ll discover which tool fits best with your workflow, budget, and technical comfort level, plus learn the specific prompts and techniques that get the best results from each platform.
Finally we’ll walk through a complete hands-on example where we will use AI tool to generate a sophisticated chart component from scratch and seamlessly integrate it into a no-code editor. By the end, you’ll have a clear roadmap for incorporating AI into your no-code projects and the confidence to start building immediately.
Should you consider using AI?
Building web stuff can feel like solving a Rubik’s cube blindfolded sometimes. You know what you want to create, but getting there often means wrestling with code, hunting down bugs, and copying the same patterns over and over until your fingers hurt.
Here’s the thing: AI tools are pretty good at handling the boring parts. They can write your boilerplate, suggest fixes for those mysterious errors, and even write article — just like this one (just joking). But when you pair AI with a visual builder — something interesting starts to happen.
Think of it like having a really smart coding buddy who never gets tired, paired with a visual canvas where you can see your ideas come to life immediately. You can ask your AI friend to generate a component, then drag it into the artboard and see it working right away. No more switching between ten different tabs and reading tons of documentation to understand how to use yet another library.
And you don’t need to be a coding wizard to make something beautiful and functional. Your designer can prototype complex mockups, your editor can create sophisticated and eloquent content, and you can focus on the big picture instead of getting lost in the weeds. It’s like having superpowers, but for making websites.
Once you experience the flow of thinking of something, asking AI to help build it, and being able to tweak it in your favorite no-code tool within minutes, you’ll wonder how you ever built things the old way.
Things you can do with AI tools
So, what can an AI tool actually offer you these days — besides generating weird memes about bombardino crocodilo and images of you looking like a character from Studio Ghibli anime? When it comes to building websites, AI is like that friend who always has a clever shortcut which actually works (well, most of the time).

Stuck on a color scheme? Ask, and you’ll get a palette that doesn’t look like a unicorn exploded. Want to turn a napkin sketch into a real, working component, or a wireframe image into a layout? AI can whip these up in seconds.
But it’s not just about speed, it’s also about experimentation with new ideas, and lots more. Here are some examples of what you can try to do with AI tools:
- Generate code components and layouts
- Help you integrate third-party tools into your website (e.g. Google Maps, crypto wallets, etc.)
- Suggest fixes for the errors you get while working with custom code
- Create sample data
- Visualize your data in a chart or graph
- Write back-end code that powers your website, even if you’re not fluent in JavaScript
- Feed your website into AI to suggest ideas for improving content, SEO, UX, etc.
But how do you actually get these AI superpowers working alongside no-code editors? You’d need to pick the no-code editor that either supports html importing, or allows you connect your own code components. Let’s dive into some practical ways to make the tools team up.
How to organize your workflow
First, let’s talk about the kinds of AI tools you can use, what makes each one special (or quirky), and what you’ll need to have ready:
Picking your AI sidekick
There’s a whole shed of AI tools out there, and picking the right one is a bit of a challenge — you might end up with not the sharpest one. Here are a few you might consider:
v0 by Vercel
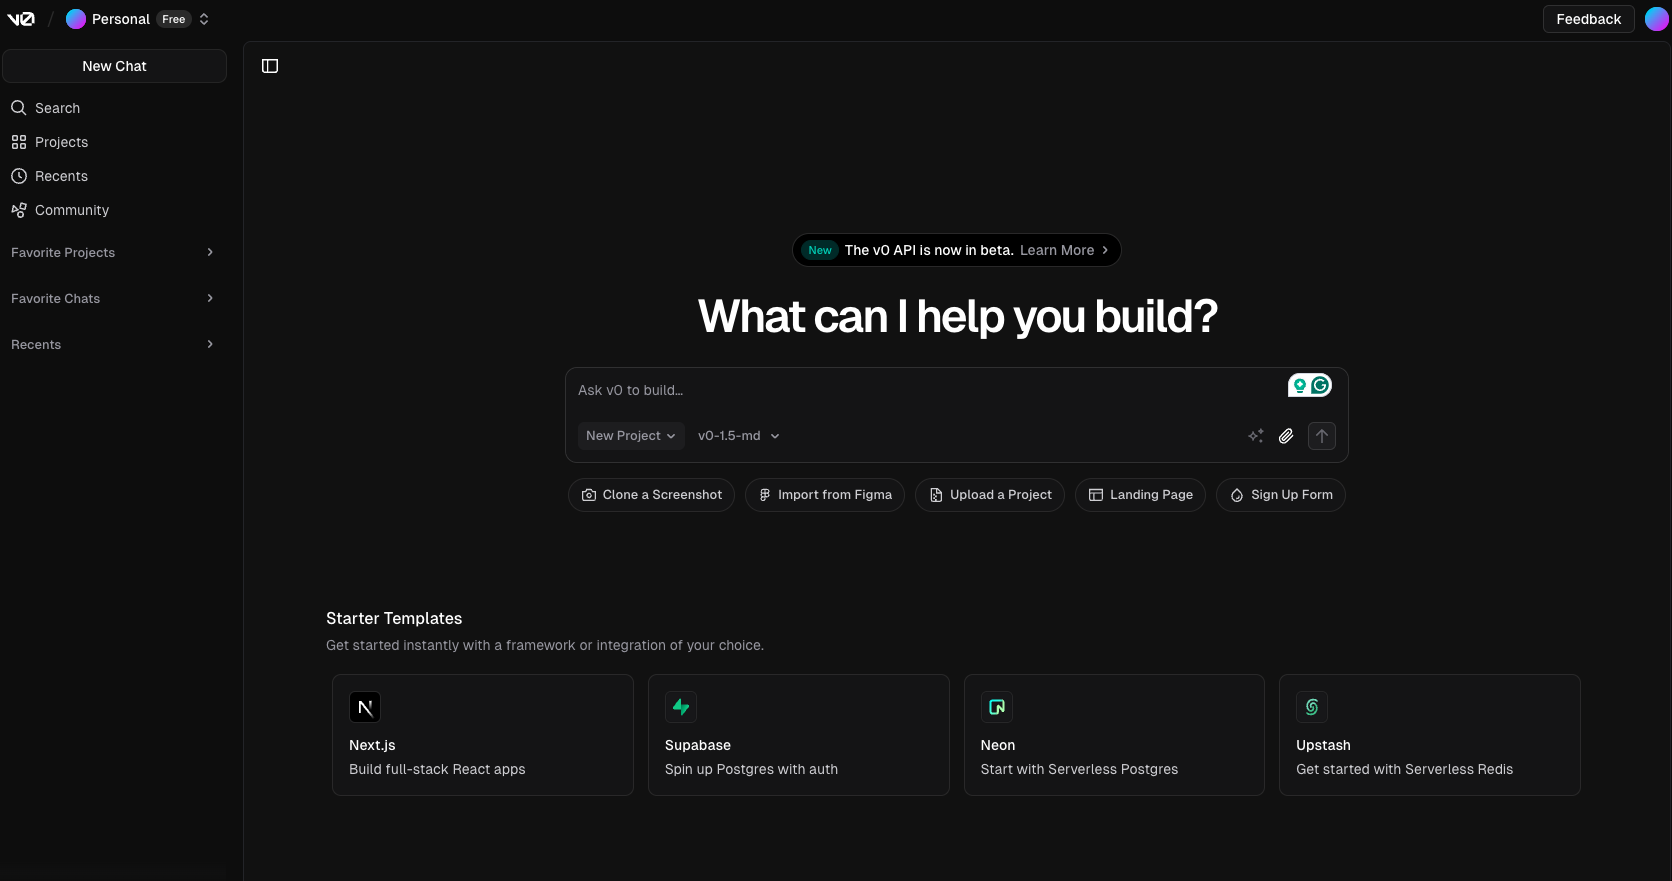
What it is: v0 is a web-based AI tool from Vercel that turns your text prompts (and optionally images) into production-ready React code, using modern frameworks and libs — Next.js, Tailwind CSS, and shadcn/ui. You describe what you want (“a dashboard with a sidebar and a chart”), and v0 generates multiple code options for you to pick, tweak, and copy into your project.
Strengths:
- Super fast for prototyping and UI ideation—great for landing pages, dashboards, and design system components.
- Generates real, copy-pasteable React code, not just pretty pictures.
- You can view the files in your project in the browser, and edit them directly.
- Lets you iterate: you can refine, fork, and remix UI variants in a chat-like interface.
- Integrates with Vercel’s deployment and supports responsive, interactive elements out of the box.
- Free tier available (with public generations), paid plans for private work.
Weaknesses:
- Only outputs React code (not Vue, Angular, etc.).
- Sometimes the code is a bit “template-y” or generic—expect to do some manual tweaking for unique needs.
- Not ideal for complex business logic or backend-heavy features.
- You’ll need to review the code for accessibility and best practices.
- Requires a Vercel account.
Best for: Designers and developers who want to quickly generate and experiment with UI components, especially in React/Next.js projects. Great for rapid prototyping and design system work.
Cursor
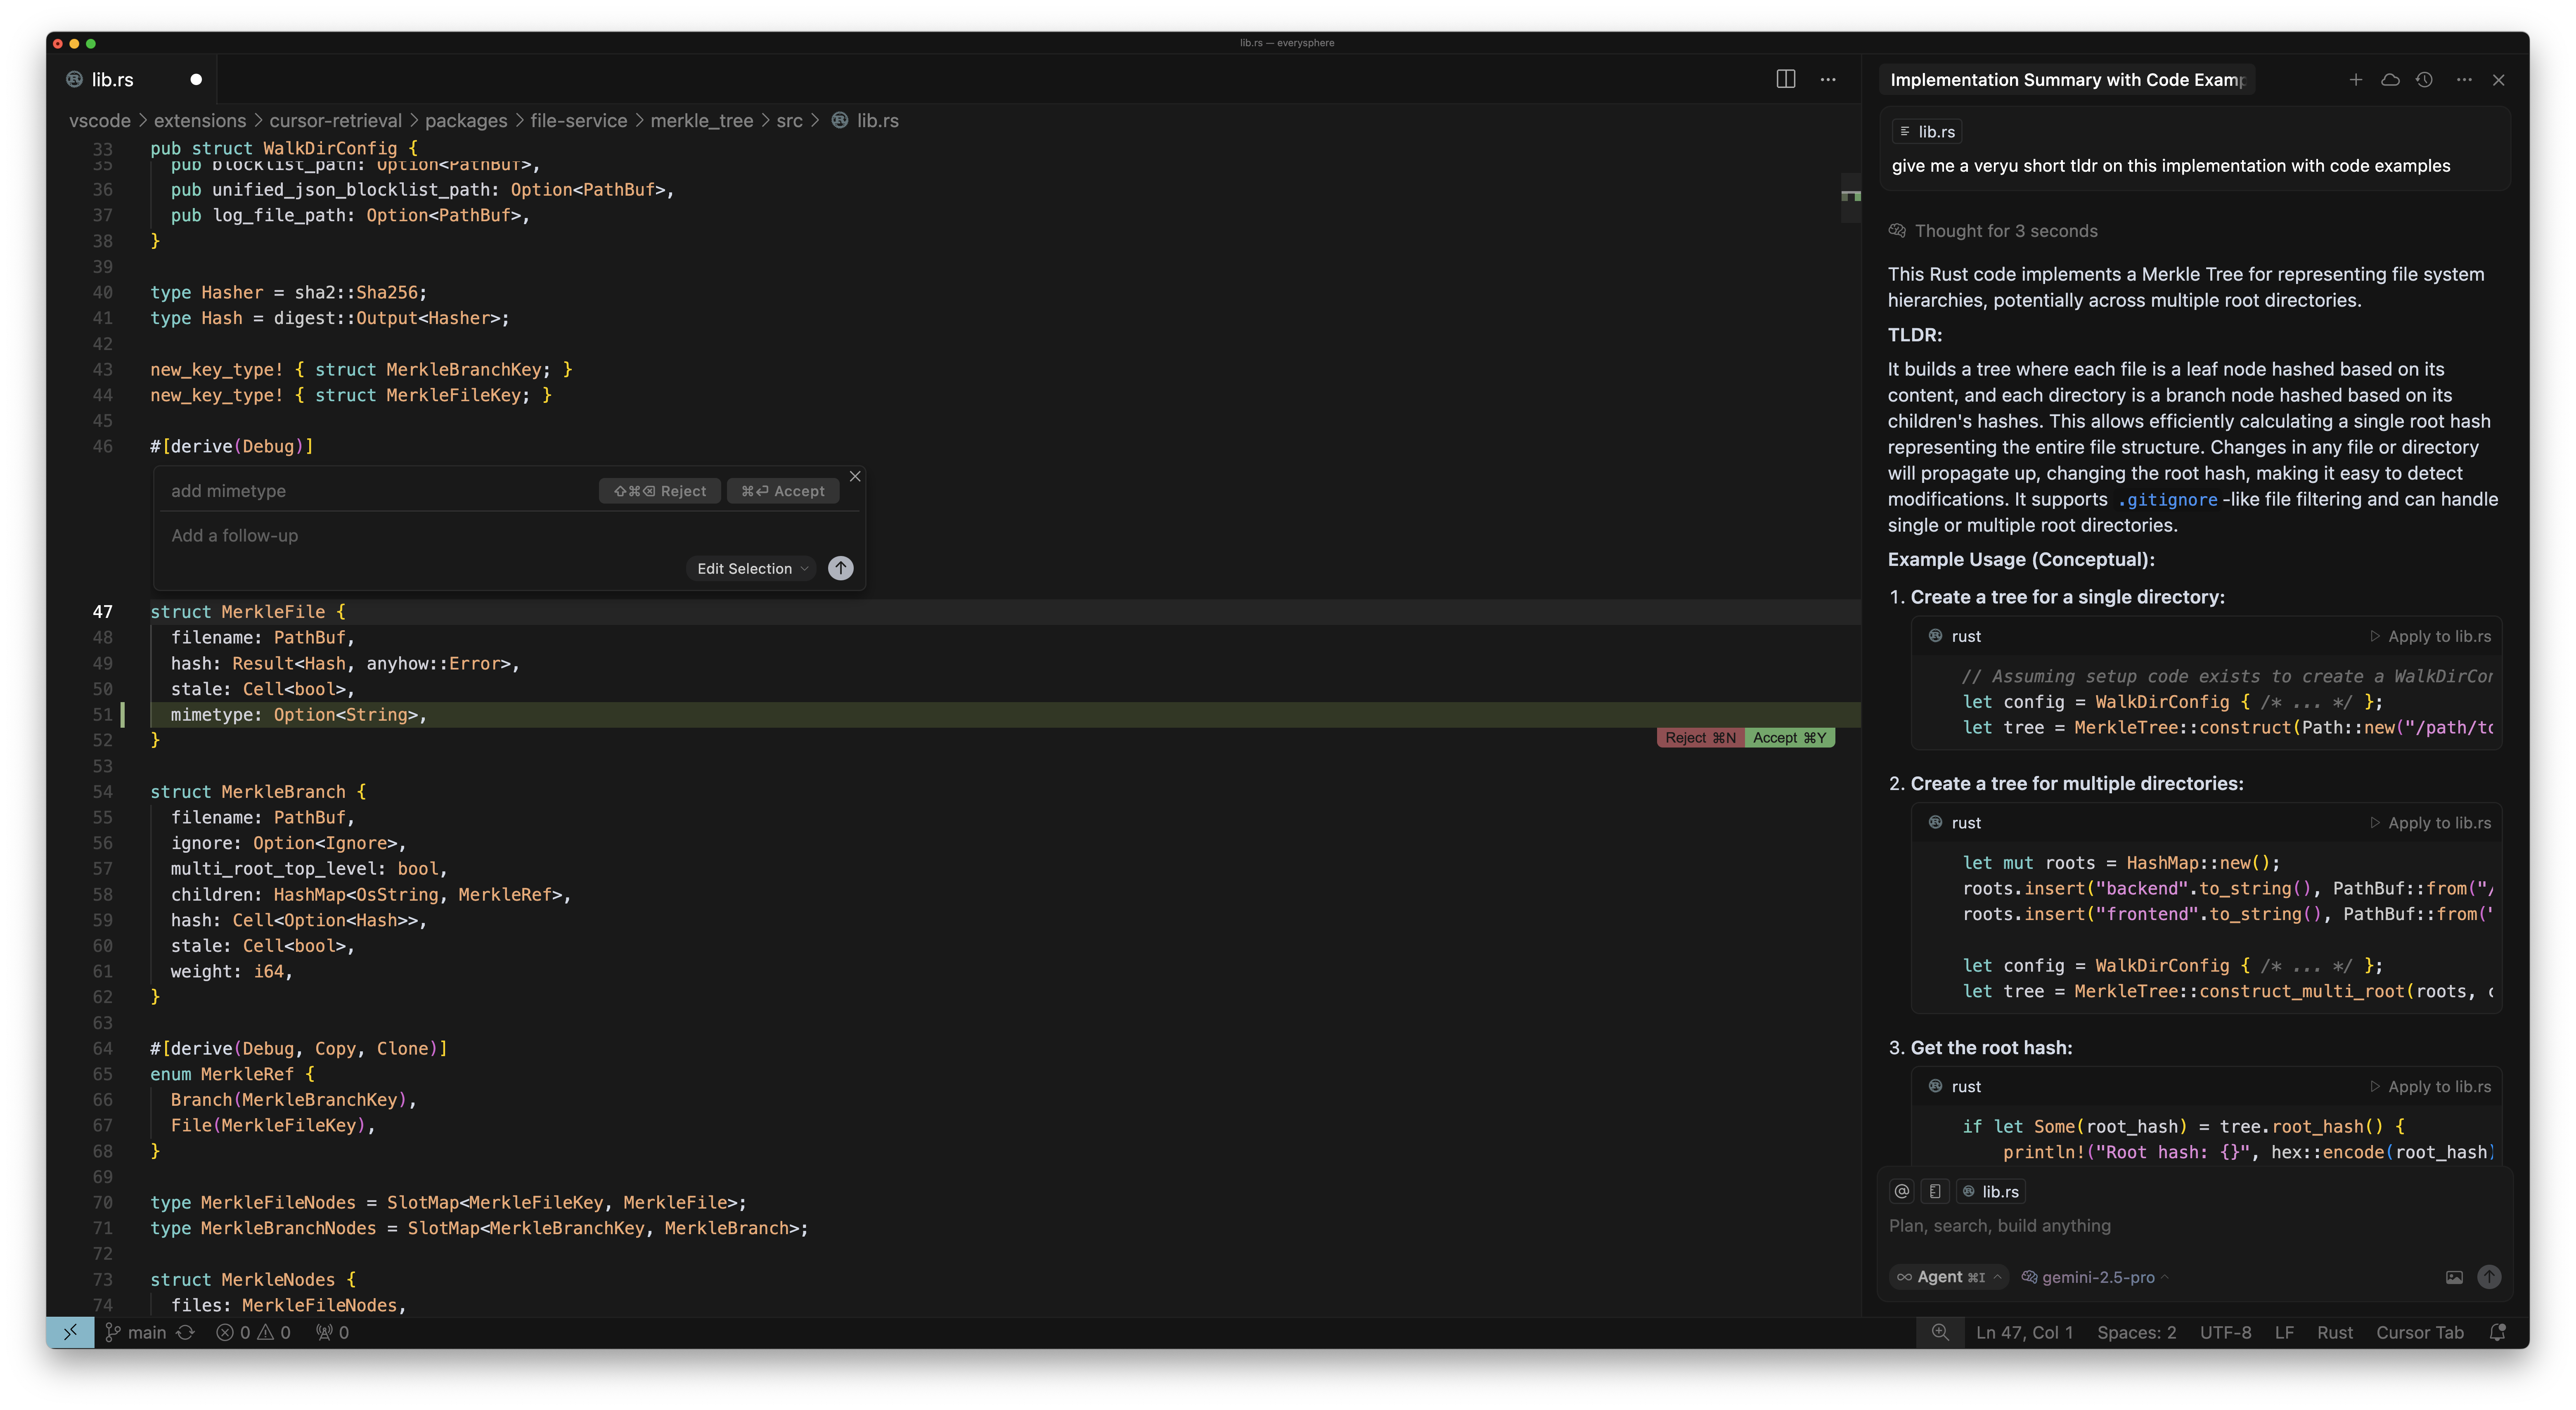
What it is: Cursor is a full-featured AI-powered IDE, built as a fork of VS Code, with deep AI integration. It’s like having a Swiss Army knife in your toolbox —- except this one comes with a built-in AI that can refactor, generate, and debug across your entire codebase. You can chat with Cursor to ask questions, use “Agent” mode for big changes across multiple files, and set up project-specific or global rules.
Strengths:
- Deep context: Cursor “sees” your whole codebase, so it can generate code that fits your project, not just generic snippets.
- Composer and Agent modes let you refactor, generate, and edit across multiple files at once.
- Supports custom rules and context management for consistent style and workflow.
- Built-in debugging, commit message generation, and multi-tab AI chat.
- Works with all your favorite VS Code extensions.
Weaknesses:
- Steeper learning curve, especially for beginners.
- Sometimes the AI “overreaches” and changes files you didn’t expect—be specific in your prompts
- Paid plans for fast, premium model access; free tier is limited.
Best for: Power users, professional developers, and anyone who seeks for granular control and context-aware AI help. If you want the latest and greatest AI models to build your codebase, Cursor is a top pick.
Windsurf
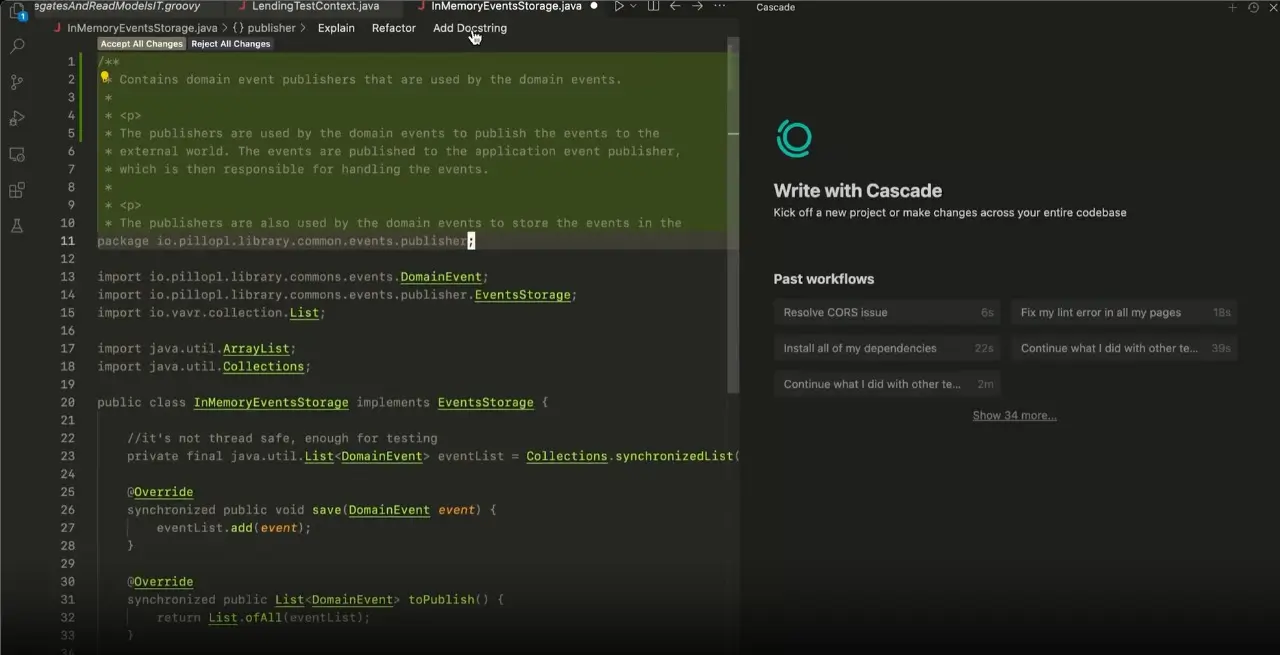
What it is: Windsurf is another AI-powered IDE, also based on VS Code, but with a focus on simplicity and beginner-friendliness. If Cursor is the Swiss Army knife, Windsurf is the friendly neighbor who shows up with a power drill and says, “Don’t worry, I’ll handle it.” Its “Cascade” agent mode is designed to handle context automatically, so you don’t have to manually specify files or context for most tasks.
Strengths:
- Very clean, intuitive UI—less clutter than Cursor, easier for beginners.
- Cascade agent can automatically analyze your project and make changes across files.
- Write Mode for generating new code, Chat Mode for Q&A and debugging.
- Live preview for web projects.
- Privacy-first: no training on non-permissive data, optional zero-day retention.
Weaknesses:
- Code quality is generally good, but sometimes less robust than Cursor for complex projects.
- Fewer power features and less manual control than Cursor.
- Some users report issues with context handling and occasional “hallucinations” in code.
- Free tier is limited; Pro plan is cheaper than Cursor but still paid.
Best for: Beginners, those who want a “just works” AI coding experience, and anyone who prefers a clean, less overwhelming interface. Great for learning, prototyping, and small to medium sized projects.
ChatGPT (web)
What it is: The classic web-based AI chat from OpenAI. You can ask it to generate code, explain concepts, or brainstorm ideas. It’s not tied to your codebase, so you’ll need to copy-paste code in and out. Quick and easy, not as comfortable as the other tools when it comes to day-to-day usage.
Strengths:
- Super accessible—no install, just open a browser.
- Great for quick questions, code snippets, and brainstorming.
- Can help with a wide range of languages and frameworks.
- Free and paid tiers (Plus for GPT-4/4o).
Weaknesses:
- No access to your codebase—can’t generate context-aware code.
- You have to copy-paste everything, which can get tedious.
- Not always up-to-date with the latest libraries or best practices.
- Can “hallucinate” or make mistakes, especially on complex or new problems.
- Not ideal for large or multi-file changes.
Best for: Quick help, learning, and prototyping. Great as a “second brain” for coding, but not a replacement for an IDE-based tool if you need deep integration.
TL;DR:
- IDE-based tools (like Cursor, Windsurf) are best for deep, context-aware help and code generation, but require setup and some technical comfort.
- Chat agents (like ChatGPT, DeepSeek) are fast and easy for prototyping, but less aware of your project’s details. Best for occasional use.
- Web-based AI app builders (like v0) are extremely good for brainstorming, designing and researching but may need more manual tweaking for Plasmic.
Pick the one that matches your style and needs. If you want hands-on, context-rich help, go for an IDE tool. If you just want to whip up a quick component, web tools are your friends.
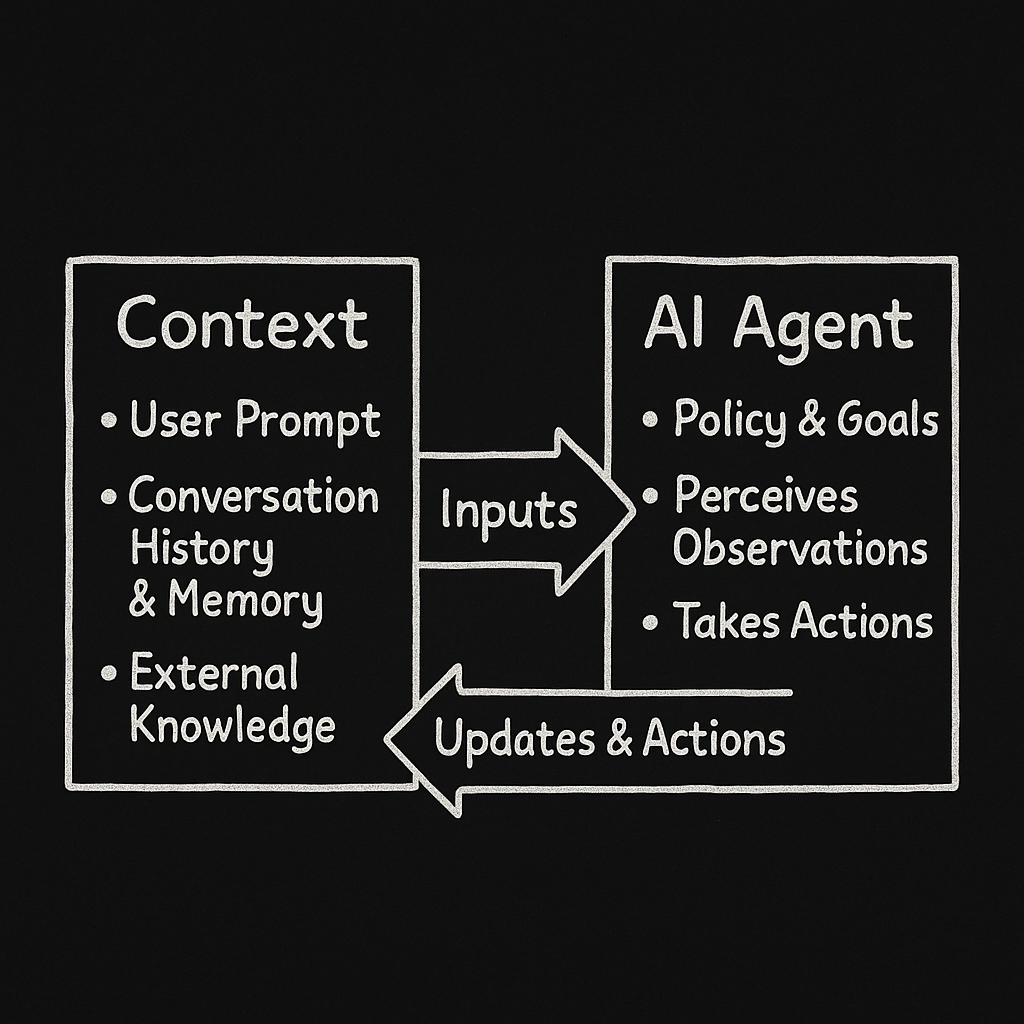
How AI Context and Agents Work
AI tools are only as smart as the context you give them. IDE-based tools like Cursor can “see” your codebase, so they can generate code that fits right in. Web-based tools, on the other hand, only know what you tell them in the chat window. That’s why it’s important to give your AI agent clear rules and context —- like what kind of code you want, how to register components for Plasmic, and any project-specific quirks.
If you want your AI agent to generate no-code compatible code, you’ll need to:
- Attach rules or prompts that explain your setup (e.g., how to write registration functions, what your folder structure looks like)
- Be specific about what you want (“generate a component and register it for me”)
- Review and tweak the output as needed
In the example below, we’ll use Cursor and integrate the output code into Plasmic. You’ll also find some handy rules and prompts below to help your AI agent play nicely with Plasmic during development.
Example: building components in Cursor and integrating them into Plasmic
What you’ll need before you start
Before you start experimenting with AI, make sure you have the following:
- A Plasmic account (sign up at plasmic.app)
- A GitHub account
- A Plasmic project, connected to an app host
- A GitHub repository for your project (how to set it up)
Useful prompts and rules
Before using Cursor, you’ll need to set it up so that it can generate quality code.
Let’s begin with setting up some rules for Cursor — here are a few steps to get you started:
- First of all, install the Cursor
- Open your GitHub repository in Cursor
- Open the Cursor settings and go to the “Rules” tab
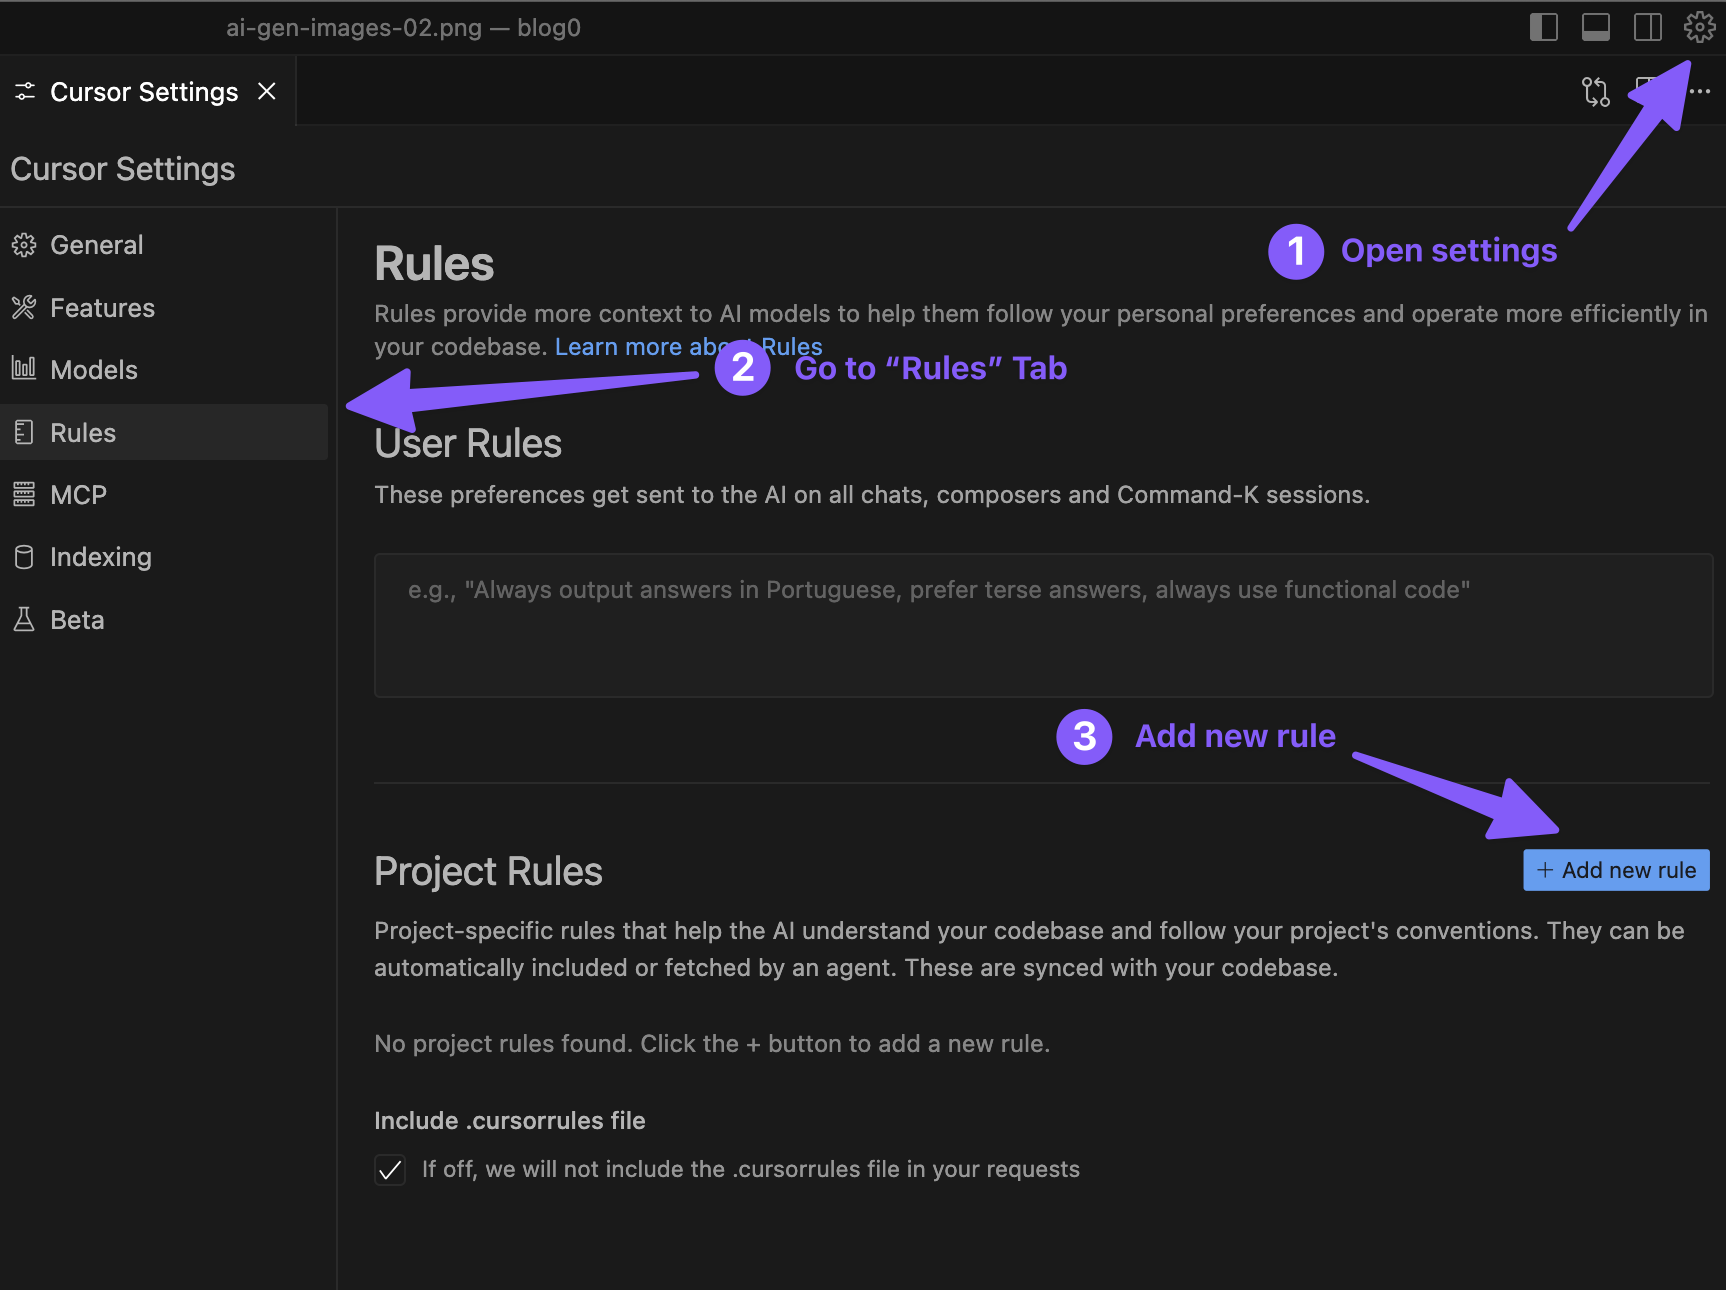
Click ”+ Add new rule” in the Project rules section
Enter the name for the rule (like “Plasmic rules”) and hit Enter
On the top of the page select the rule type (we’ll use “Always” for this example), here’s a quick breakdown of what each type means:
- “Always” - This rule will always be applied to the project
- “Manual” - This rule will only be applied when you manually trigger it
- “Auto attached” - This rule will be attached to the request automatically based on the file type
- “Agent requested” - This rule will be attached to the request automatically based on the desciption
Paste the contents field (line 8 through line 86) from this file into the rule
Save the file with the newly created rule
Now let’s connect Plasmic documentation so that Cursor can use it while making changes to your code:
- In the Cursor settings, go to the “Features” tab
- Scroll down to the “Docs” section, and click ”+ Add new doc”
- Paste the following URL: https://docs.plasmic.app/ , hit Enter
- Enter the name for the doc (like “Plasmic docs”) and hit Enter
- Wait for the doc to be indexed, the dot will change the color to green when done.
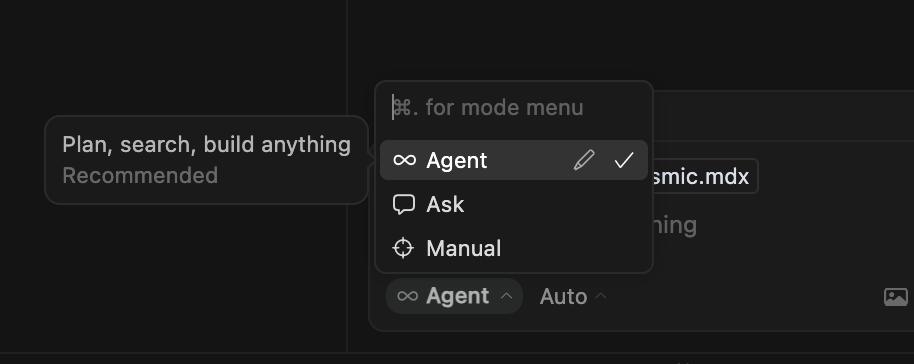
As a last (optional) step - make sure that you use the advanced model when making requests. In the chat window on the bottom right click “Agent” pill, hover over it in the popover, and click the pencil button. For the example we will use claude-4-sonnet, but feel free to experiment and see which one works best for you.
We also highly suggest you to go to the cursor.directory and find the rules, MCP’s and prompt that would suit your needs.
Creating the component and integrating it into Plasmic
Assuming you have all the prerequisites set up, we would need to:
- Open your GitHub repository in Cursor
- In the right sidebar enter your prompt:
Make sure to follow the rules for creating Plasmic components.
Create a chart component and register it for Plasmic.
The component should be able to render the chart using the data passed from the studio as a prop "data", which would be an array of objects with the following shape:

{
    label: string;
    value: number;
    color: string;
    date: string;
}

Core elements of the component should be styleable from the Plasmic studio design tab.
Double check that all the positioning is correct, graphics render properly in browser, and all the data is visible and available.
The component should have a nice UI, be responsive and have a nice drawn animation when the data is loaded, or when the data is changed, as well as hover animations.
It also needs to have a few different modes of representation:
- Line chart
- Bar chart
- Pie chart
Click the “Send” button
Wait for the output to finish generating component, accept the changes.
Launch the dev server (
npm run devoryarn dev)Navigate to the Plasmic Studio and create a new page
- Drag and drop the
Components->Chartcode component into the page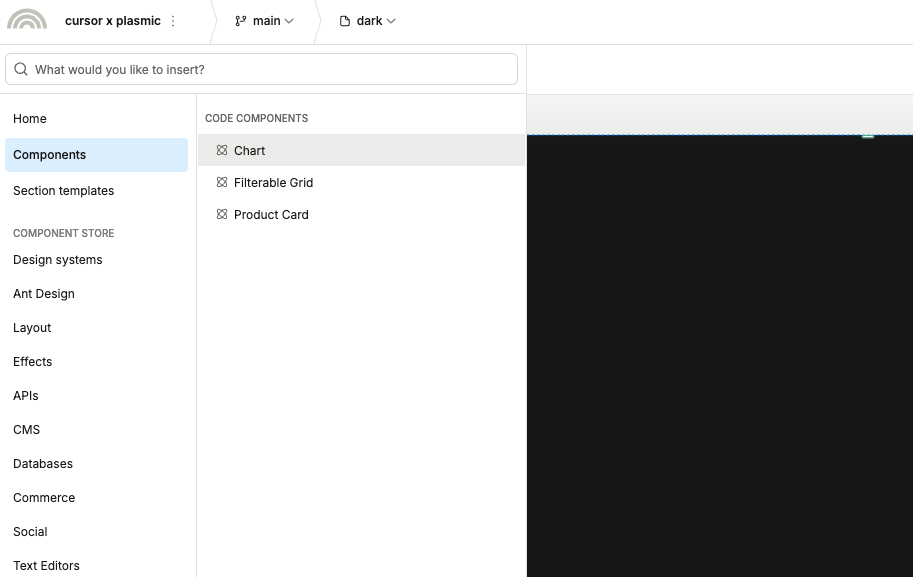
Configure the component as needed
When everything is done, you now should be able to ask your AI agent to commit your change to the repository, and publish your project.
Conclusion
To sum things up — it’s not magic (though it might feel like it sometimes), and it won’t replace your brain, but it can definitely make your life easier and your projects more interesting.
You get to focus on the fun stuff: the big ideas, the creative problem-solving, uninterrupted creative process, while AI handles the repetitive code, the boilerplating, and working on the in-depth technical details you’re not interested in or strong at.
Doesn’t really matter whether you go with v0, Cursor, Windsurf, or good old ChatGPT — the key is to start small. Pick one tool, set it up properly, and try building something simple. Maybe a button, a chart, or maybe that same component you wanted to add to your project for a long time.
The web is getting more interesting, tools are getting smarter, and the gap between having an idea and actually being able to build it without having to spend 5 years learning how to code is shrinking every day. No-code tools give you the visual canvas, AI gives you the coding superpowers, and you bring the creativity.
Now stop reading and go build something cool!
Follow @plasmicapp on Twitter for the latest updates.