Plasmic + Rive
- Authors
- Link
- Alex Noel

- Last updated
Every interaction on a website—no matter how small—has the power to make it feel alive. We’ve all scrolled past static pages craving a little spark: a button that springs to life, an icon that gently pulses, or a switch that elegantly transforms.
At Plasmic, we believe the websites should feel like as if you’ve put your soul into them, using the tools that you truely love. That’s why we’re integrating Rive into our platform — the design tool that turns artboards into dynamic experiences. More than just importing animations, adding Rive bridges two best-in-class tools to let you craft, control, and connect interactive visuals—all without resorting to code.
🔗 Live demo: https://rive-demo.plasmic.run/
🛠️ Project: Plasmic Studio | Rive Demo
📄 Docs: Plasmic Documentation | Rive
Bring your own tools
We know you’ve already invested in design, prototyping, and animation workflows. Plasmic isn’t about locking you in — it’s the glue that ties your favorite tools together. Plasmic stitches everything into a single visual canvas, whilst allowing you to design complex parts in the comfortable environment you’re already comfortable with. You get drag-and-drop across ecosystems, auto-generated code, and interactive previews—all under one roof with little to no learning curve. Below are a few steps to get you started with Rive in Plasmic:
Full support for state machines and variables
Plasmic is the only no-code integration which exposes the internal Rive state to our studio, which allows for a seamless state management between Rive and Plasmic.
This means that you can read and modify the Rive animation state variables from within Plasmic studio and trigger Rive animations using Plasmic elements as controls without losing the ability to interact with the the animation using the elements living inside the .riv file.
Create your animation in Rive
First, head over to Rive and sign in or create a free account. Once inside your workspace, create a new file to bring up the Rive editor, where you’ll see a clean, intuitive interface designed to help you bring your ideas to life.
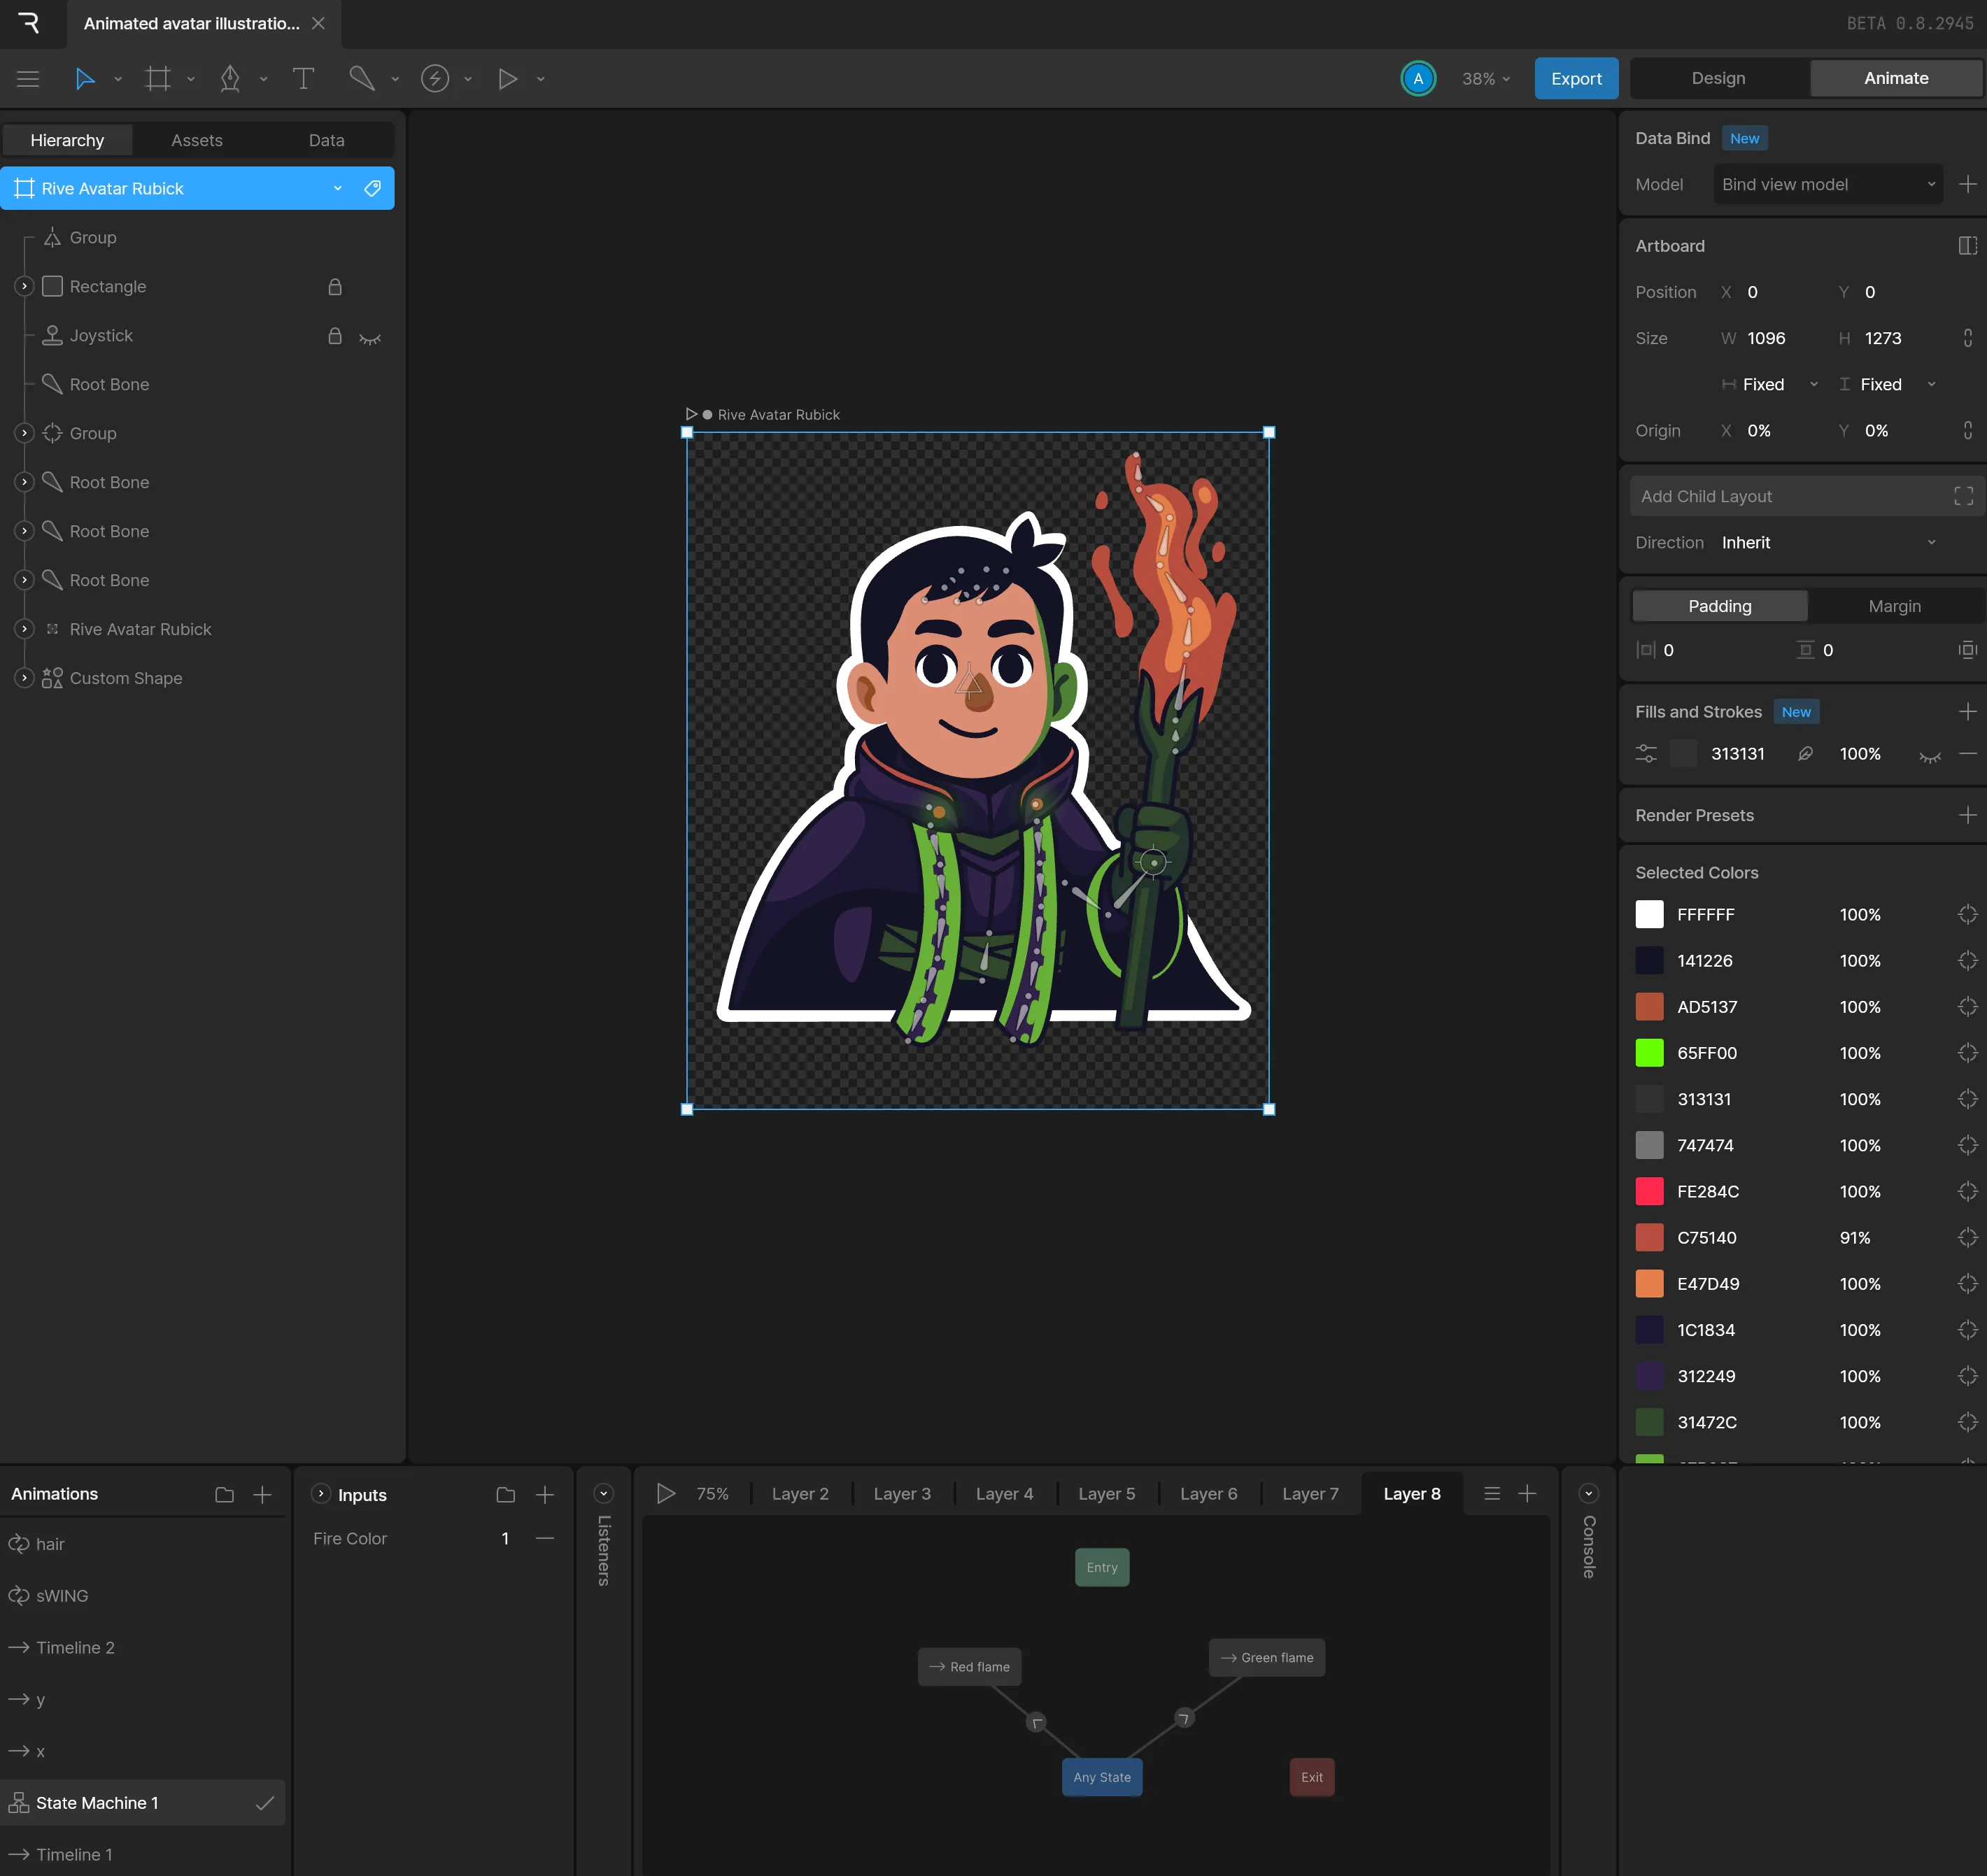
Rive’s workspace is divided into several key panels:
- Toolbar: Located at the top, this is where you’ll find tools to draw, select, and manipulate shapes, as well as options to customize your artboard and export your work.
- Hierarchy: On the left, the Hierarchy panel displays all the objects, groups, and animations in your file. It’s a tree view that helps you organize and manage the structure of your project.
- Inspector: On the right, the Inspector lets you tweak properties of the currently selected object—like color, size, or animation settings. The options here change depending on what you’ve selected.
- Stage: The central canvas is called the Stage. Here, you’ll create and arrange your artboards, draw shapes, and see your animation come to life.
- Timeline: When you switch to Animate mode, a Timeline appears at the bottom. This is where you’ll create new animations, set keyframes, and control playback.
For a deeper dive, check out the official Rive documentation for more tips and advanced features.
Exporting your animation
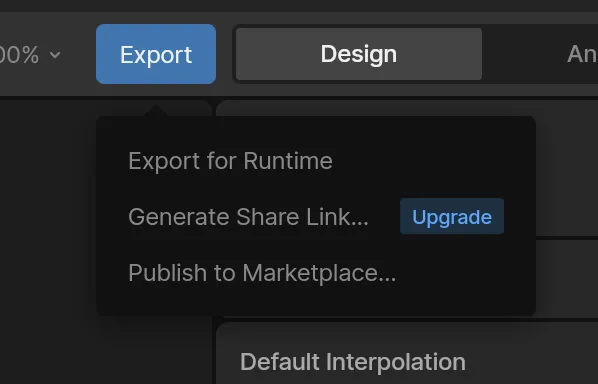
When you’re done with your animation, you can either export it as a link if you’re using a paid Rive account, or download the animation as a .riv file and host it yourself. You will be able to find both option in the Rive editor on the top right corner when clicking on the “Export” button.
As a quick option for testing things out you can serve your file through the app host connected to your local server, or upload to any publicly available file storage CDN.
Drop Rive into your pages
Flip back to Plasmic Studio. Go to the page where you want to use the animation and open up the insertion panel. Then search for “Rive” component and drag it into your page. You’ll now see a Rive element with default .riv file in your artboard. Plasmic treats it like any built-in or custom component, letting you combine it with text, buttons, and more. Select the element on the artboard, and paste the link to your .riv file into the “Source URL” field.
Rive component settings explained
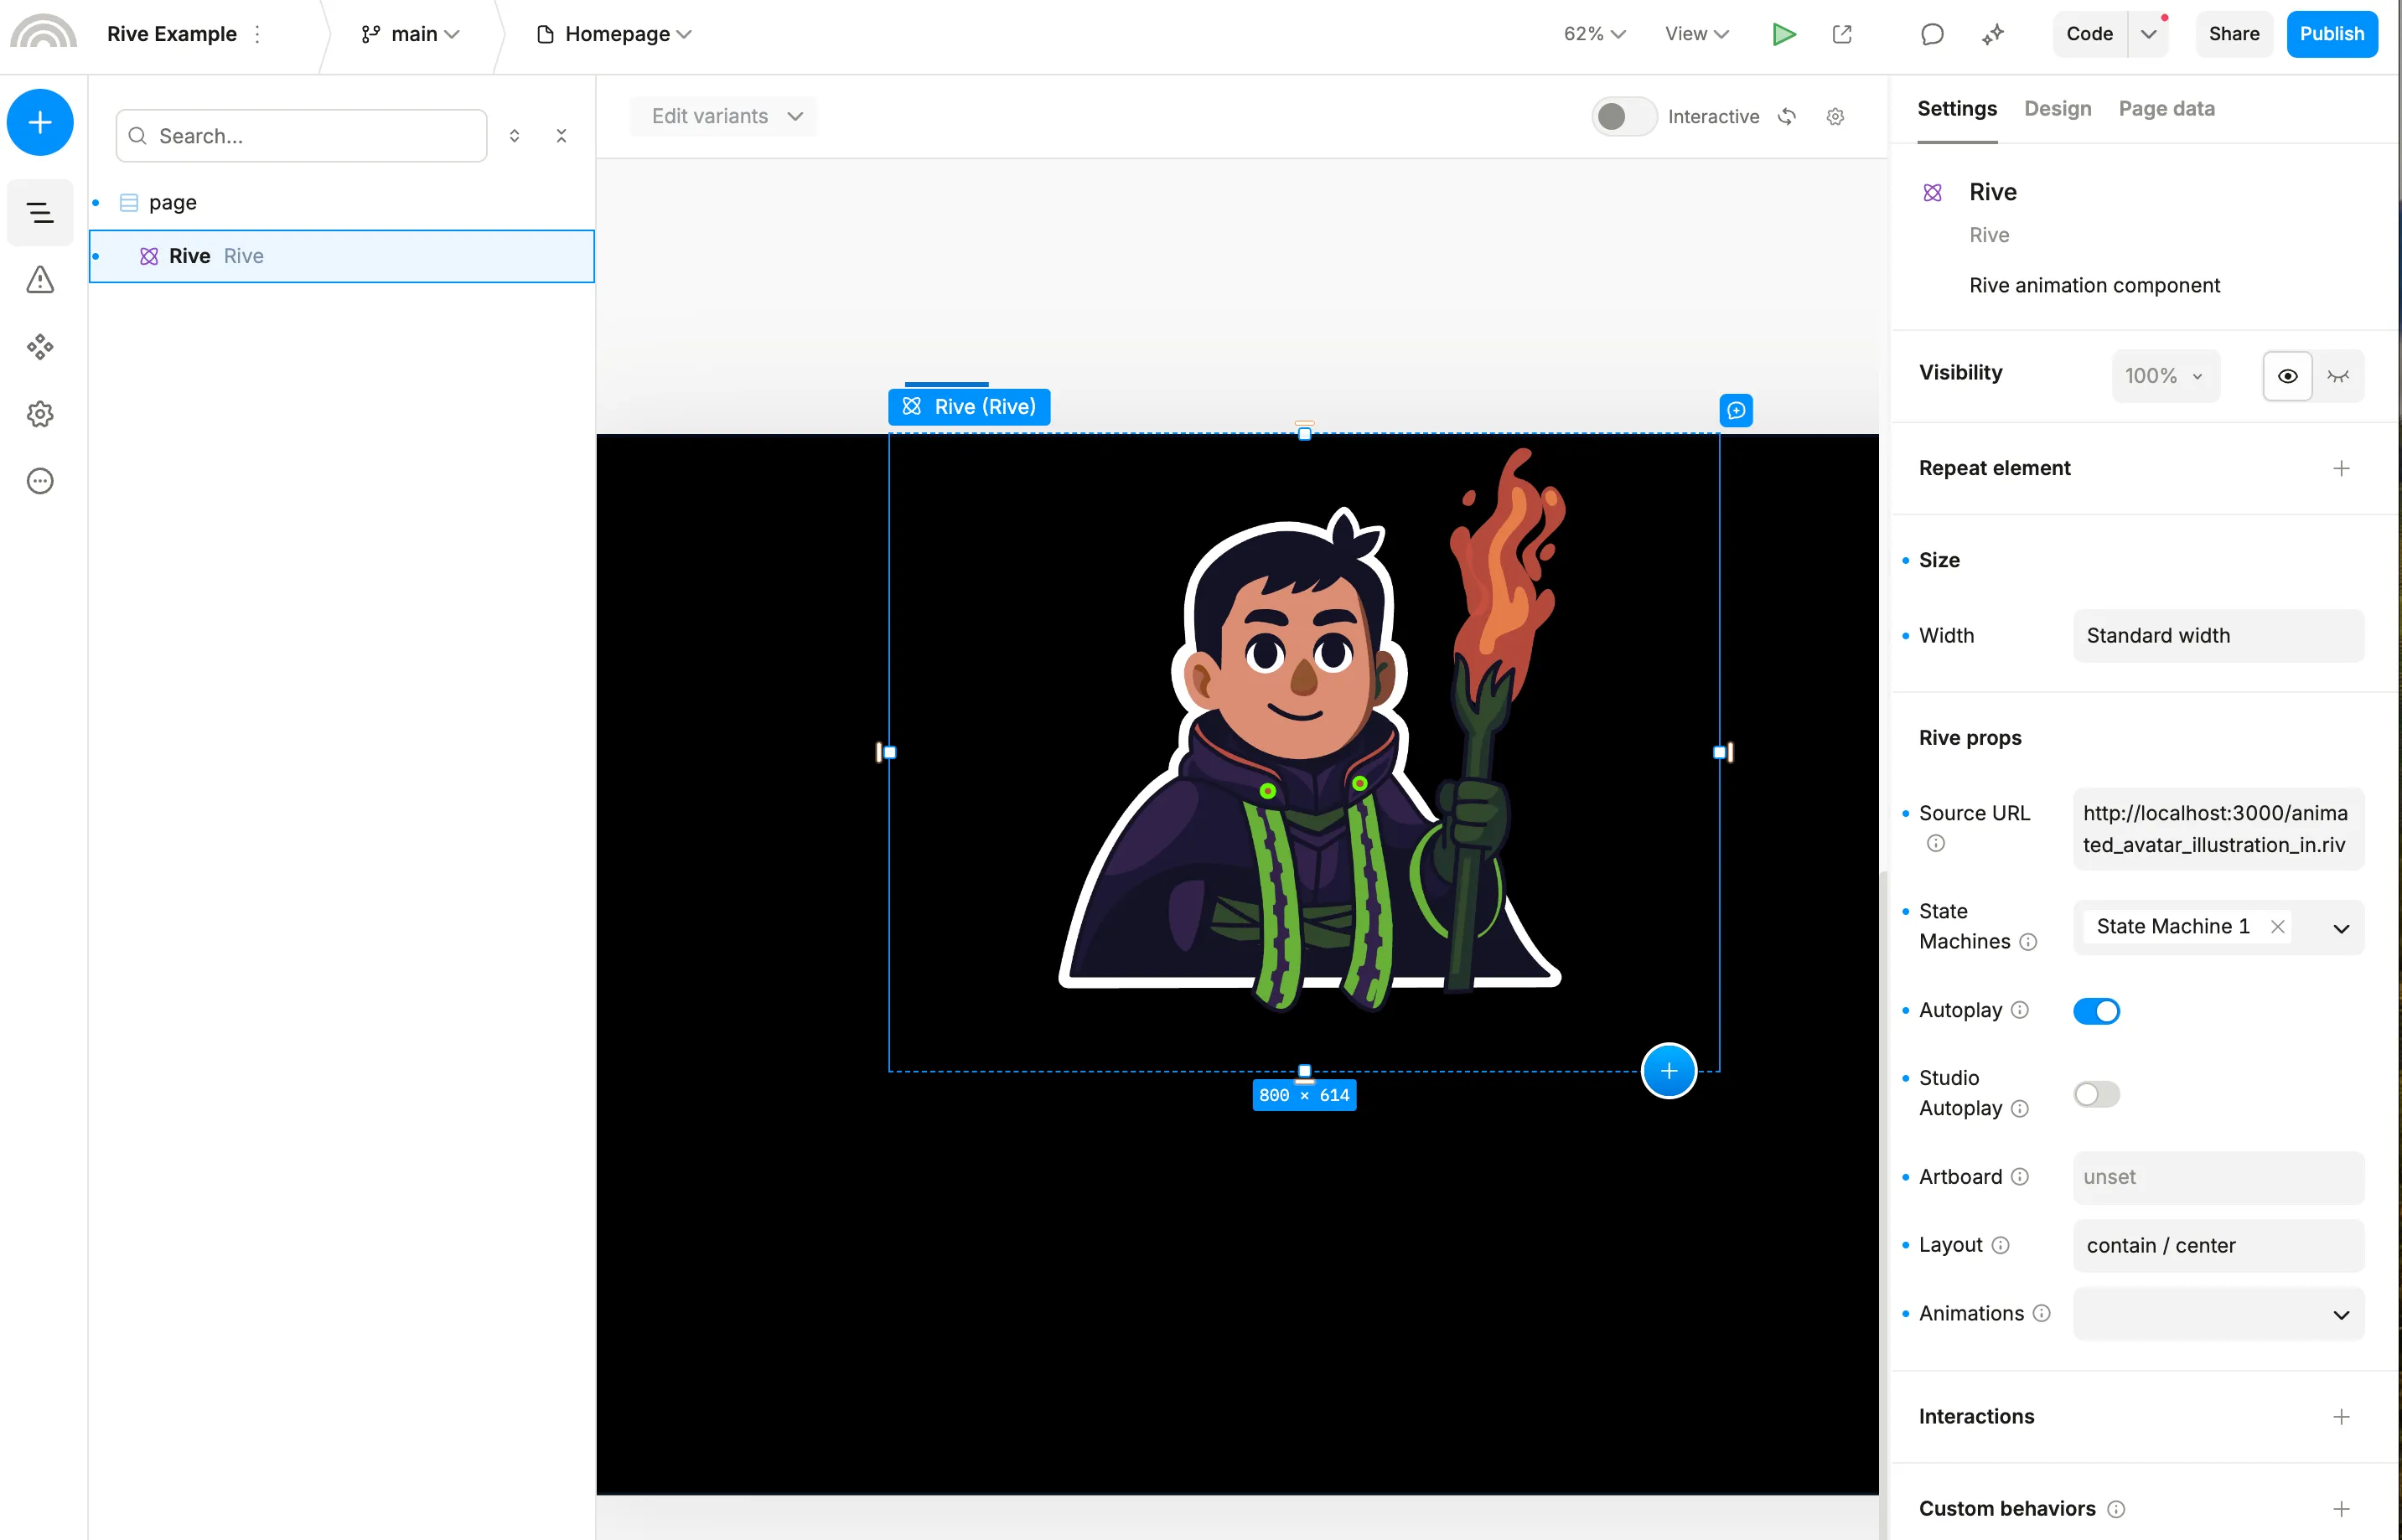
When you select the Rive component in Plasmic Studio, you’ll see a variety of settings in the right-hand panel. Here’s what each one means:
- Source URL: The link to your
.rivanimation file. Paste your animation’s URL here to load it into the component. - State Machines: If your Rive file contains state machines (for interactive or multi-state animations), select which one to use. This enables advanced interactivity, letting you control animation states from Plasmic or via user input.
- Autoplay: When enabled, the animation will start playing automatically as soon as it loads. Turn this off if you want to trigger playback manually or via interactions.
- Studio Autoplay: This option controls whether the animation autoplays inside Plasmic Studio’s editor. It’s useful for previewing animations while designing, without affecting the published site’s behavior.
- Artboard: If your Rive file contains multiple artboards, you can select which one to display. Leaving it unset will show the default artboard.
- Layout: Controls how the animation fits within its bounding box. Options like
contain / centerensure the animation scales to fit while maintaining its aspect ratio and centering it in the component area. - Animations: If your Rive file includes multiple named animations, you can select which animation(s) to play. This is useful for switching between different animation sequences within the same file. This flow is not recommended by Rive, and instead in most cases you should be able to get by with animation state machine inputs — we left this option available to make sure you get as most flexibility as possible.
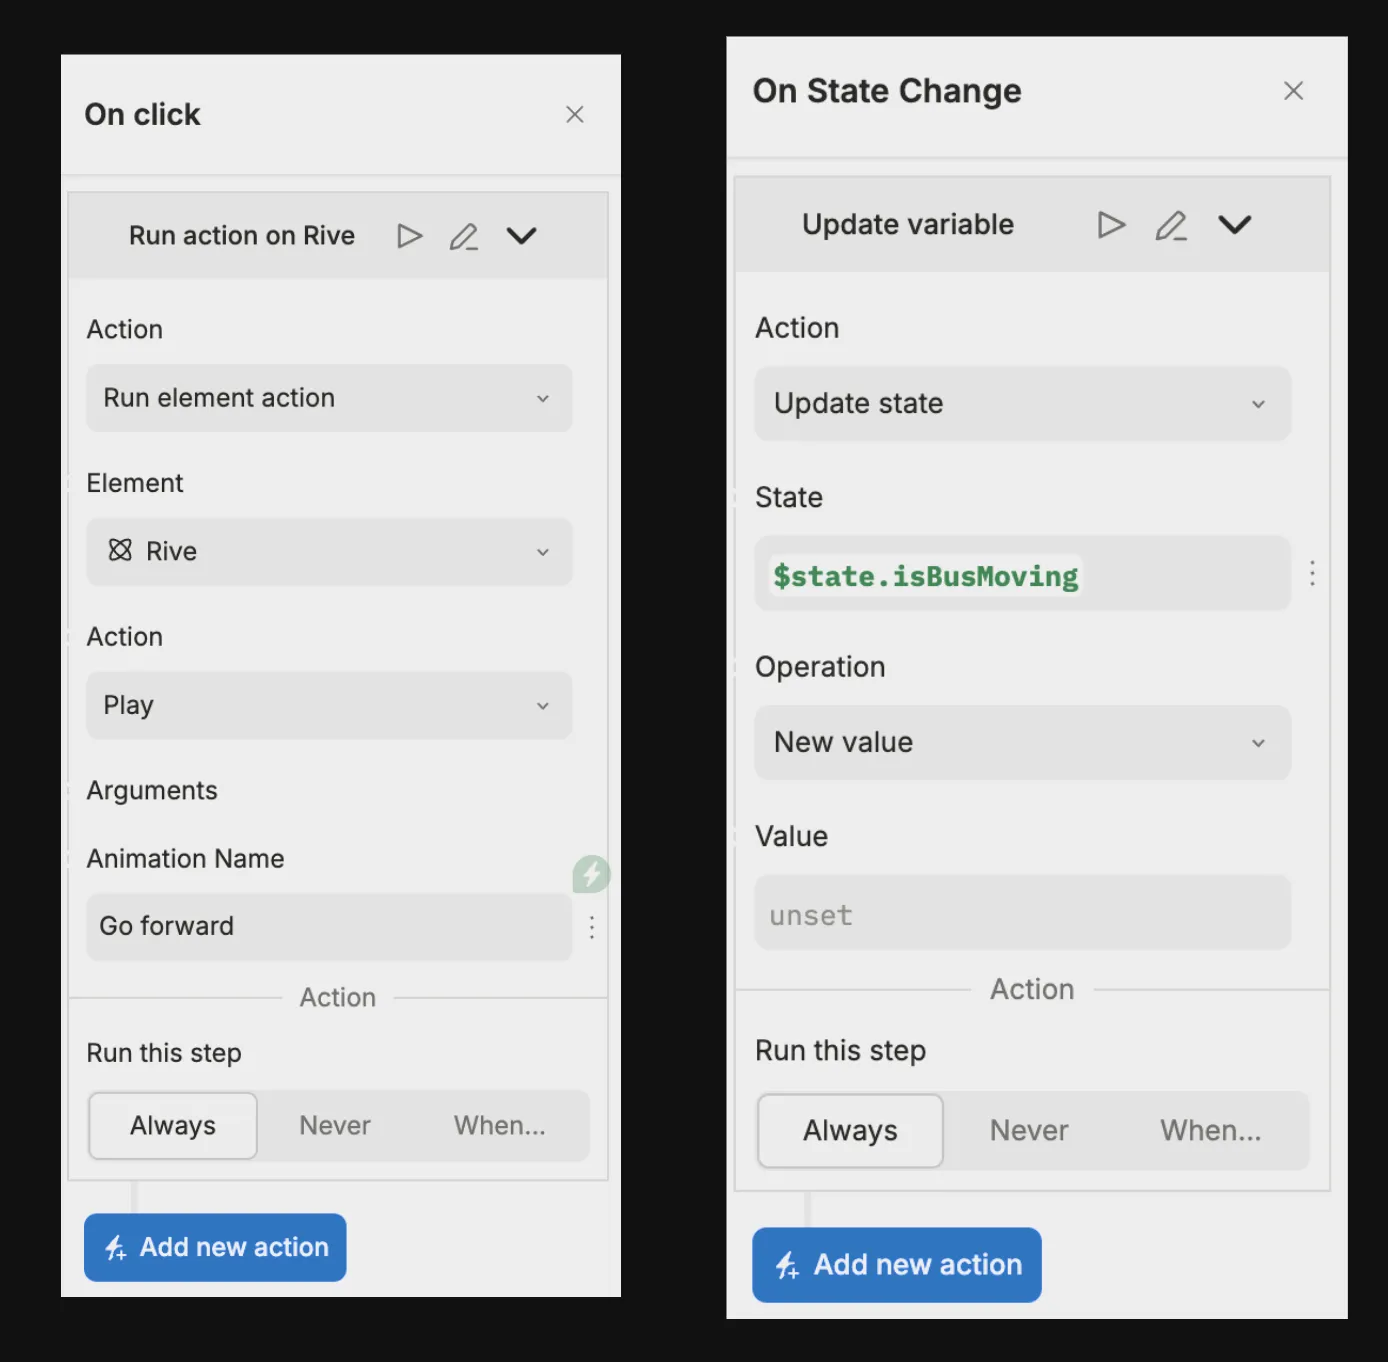
And below you can see how the interaction handling works in Plasmic Studio. On the left side you can see an OnClick interaction that will trigger the Play action on the Rive component, and on the right side you can see how the Rive component is configured to update the Plasmic state whenever animation state changes:
Map UI controls to Rive inputs
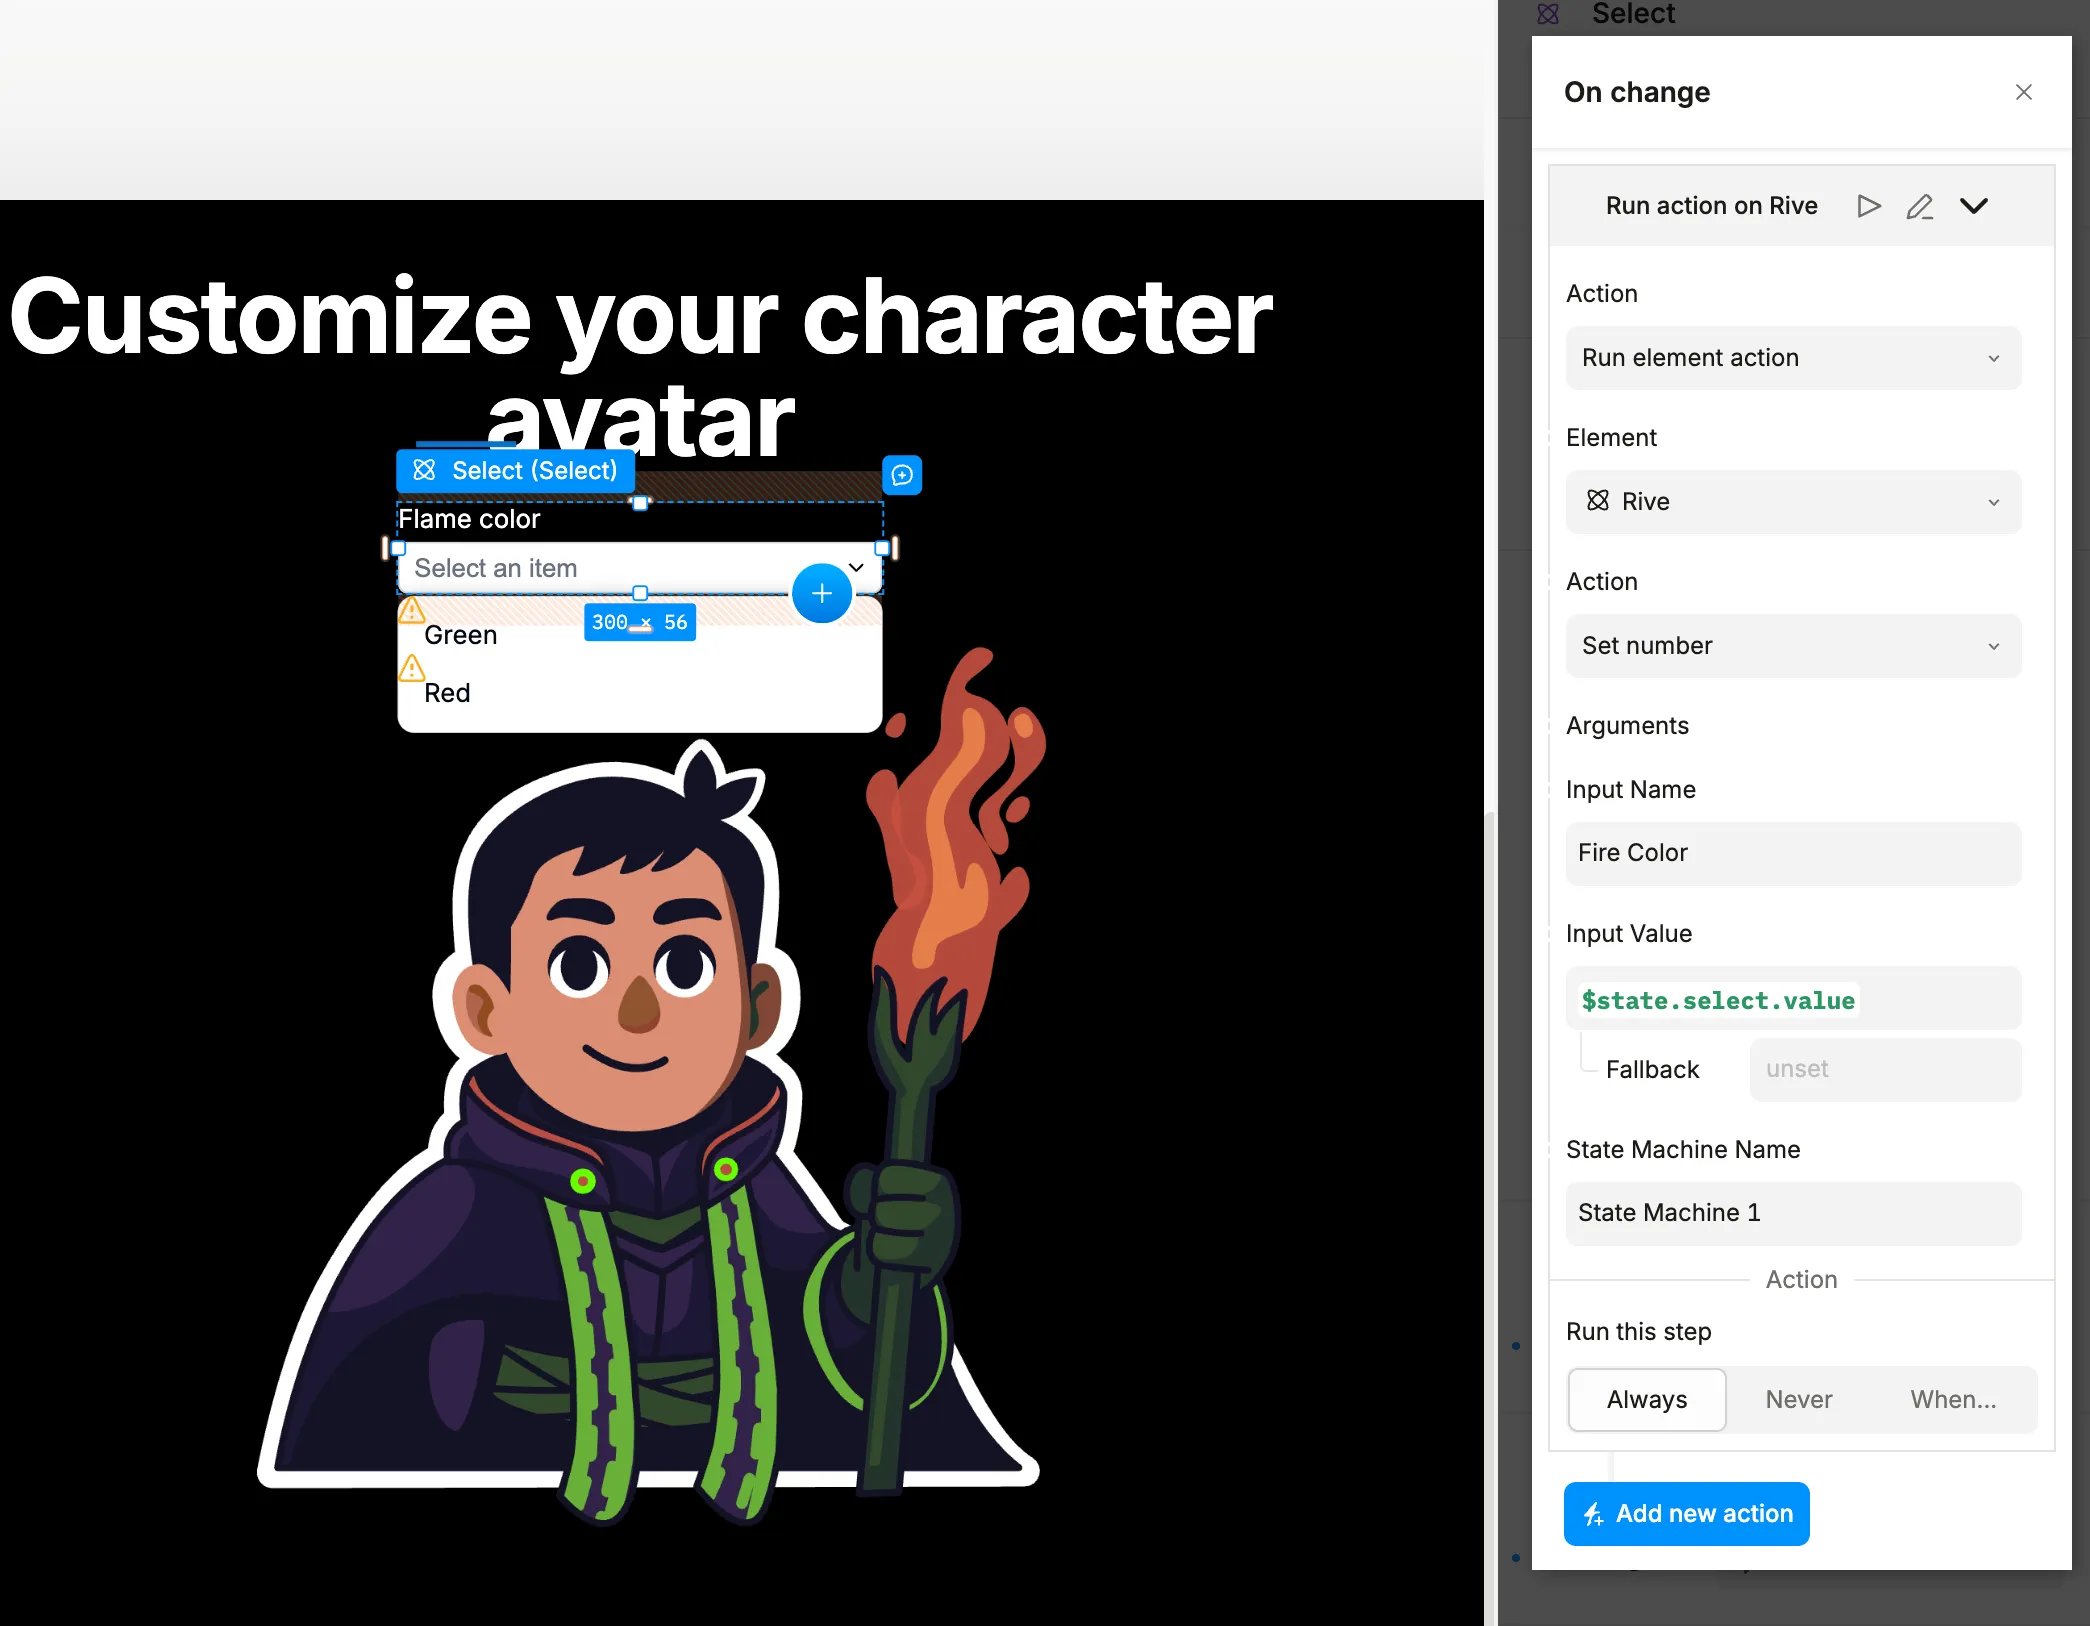
Now for the magic: add some elements from the insertion panel, in our case this will be a header and a select component, tweak them to your liking. A few more steps, and you will be able to customize your Rive animation using Plasmic elements:
- Focus on the the ‘Select component’
- Scroll down to the’ Interactions’ section in the right panel
- Create a new interaction by clicking the
+button and selectingOn changeevent. - Select
Run element actionfor an action - Select
Riveas an element to run action On - In our example we will set the number, so the action will be
Set number - For the arguments we need to specify the input name from your state machine, case sensitive, in our case it’s
Fire Color - For the input value you will need to specify the dynamic value of the select component.
- Specify the state machine name, in our case it’s
State Machine 1
Done! You will end up seeing something like this:
Previewing your animation
Now that you’ve mapped your controls, it’s time to see your animation in action. In order to do that you would either need to enable the Studio Autoplay option in the Rive component settings or preview your changes by clicking the “Play” button on the top right corner, or hitting the “L” hotkey.
Shout out to the Rive community
We’d like to thank the Rive team and the community for their support a warm welcome. We’re excited to see what you’ll build with Rive in Plasmic. Special shoutout to Jakub Matias for working on this integration from Rive’s end, and making this whole experience possible. Original animation used in this article was created by @seranggapatah
What’s next?
We’re excited to see what you’ll build with Rive in Plasmic. Sign up today to try it out and let us know what you think!
Follow @plasmicapp on Twitter for the latest updates.